Integrating onto Chasing M2 PRO MAX ROV🔗
Introduction🔗
This is a manual on how to install the Water Linked Sonar 3D-15 on the Chasing M2 PRO MAX. Other information from Chasing can be found at:
What's in the box🔗
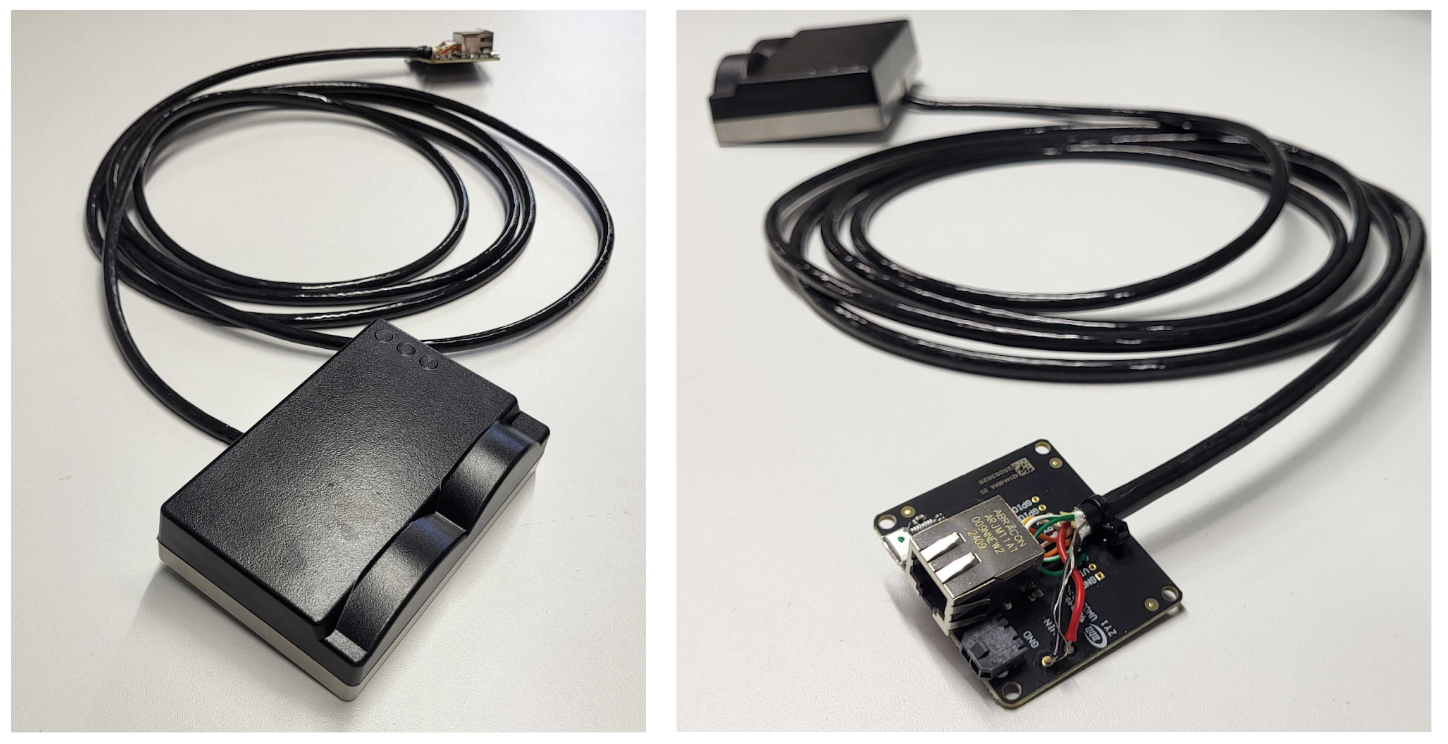
The Sonar 3D-15 box from Water Linked comes normally with an attached I/O Interface board.
What You’ll Need🔗
To follow this guide, you will need the following:
-
A phone or tablet with the CHASING GO1 app
- Can be found at Google Play or App Store
-
Chasing Connector
- Contact Chasing - hi@chasing.com
-
A mount (Sonar 3D-15 to ROV)
- An example can be downloaded from here: 3D step file
-
Correct screws
- See the Mounting section
-
Buoyancy module
- Contact Chasing - hi@chasing.com
-
CHASING Quick Mounting Bracket
- Contact Chasing - hi@chasing.com
Connector Setup🔗
Testing the Sonar 3D-15 Separately
If the I/O Interface board is attached, the Sonar 3D-15 can be tested directly using an Ethernet cable and a power supply. If you wish to test the device on its own before integration, follow the general Quickstart tutorial, available here: Quickstart.
Connecting to Chasing ROV
The most common solution is to terminate a Chasing connector to the cable of the Sonar 3D-15. To do this, we recommend the following procedure:
-
Remove the I/O board After this step, the I/O board is no longer needed for normal operation.
-
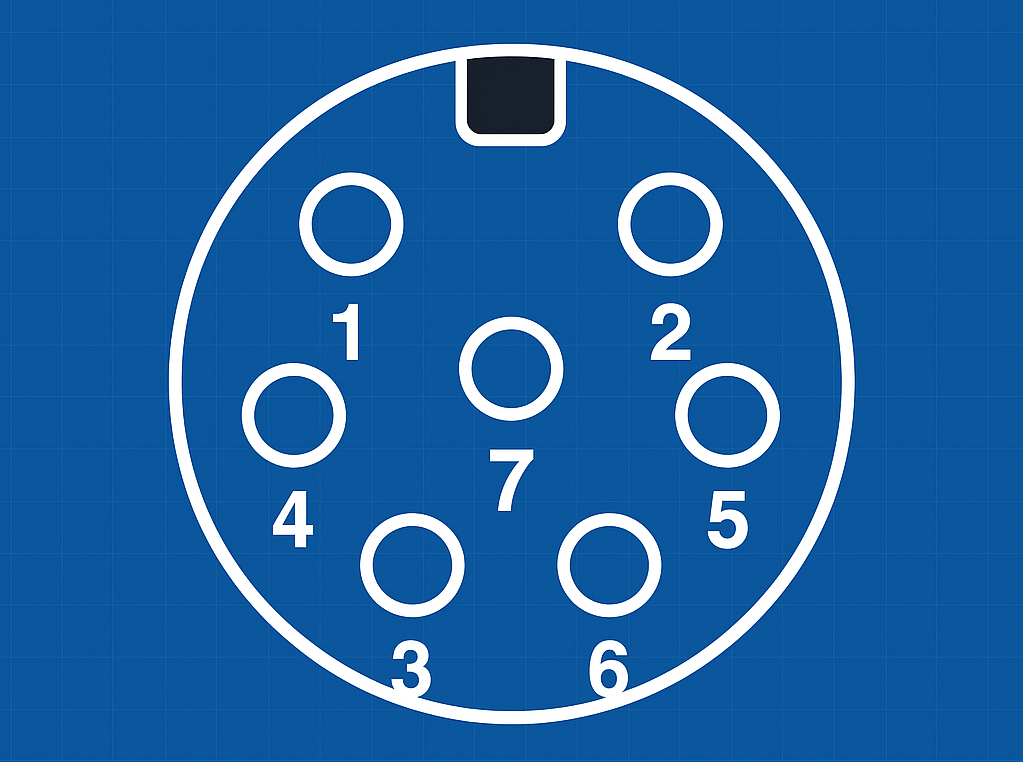
Terminate a Chasing connector to the Sonar 3D-15 cable using the table below.
Sonar Cable Type Sonar Cable Color Chasing Cable Color CHASING connector male DC- Black Black 1 DC+ Red Red 2 RX+ Green/White White 6 RX- Green Brown 5 TX+ Orange/White Green 4 TX- Orange Yellow 3 NC NC NC 7 The following is a picture of the pins for the male Chasing connector face:
-
Add a waterproof seal around the termination.
Note
The termination has to be waterproof and needs to withstand the depths of which you will be running your ROV.
Mounting🔗
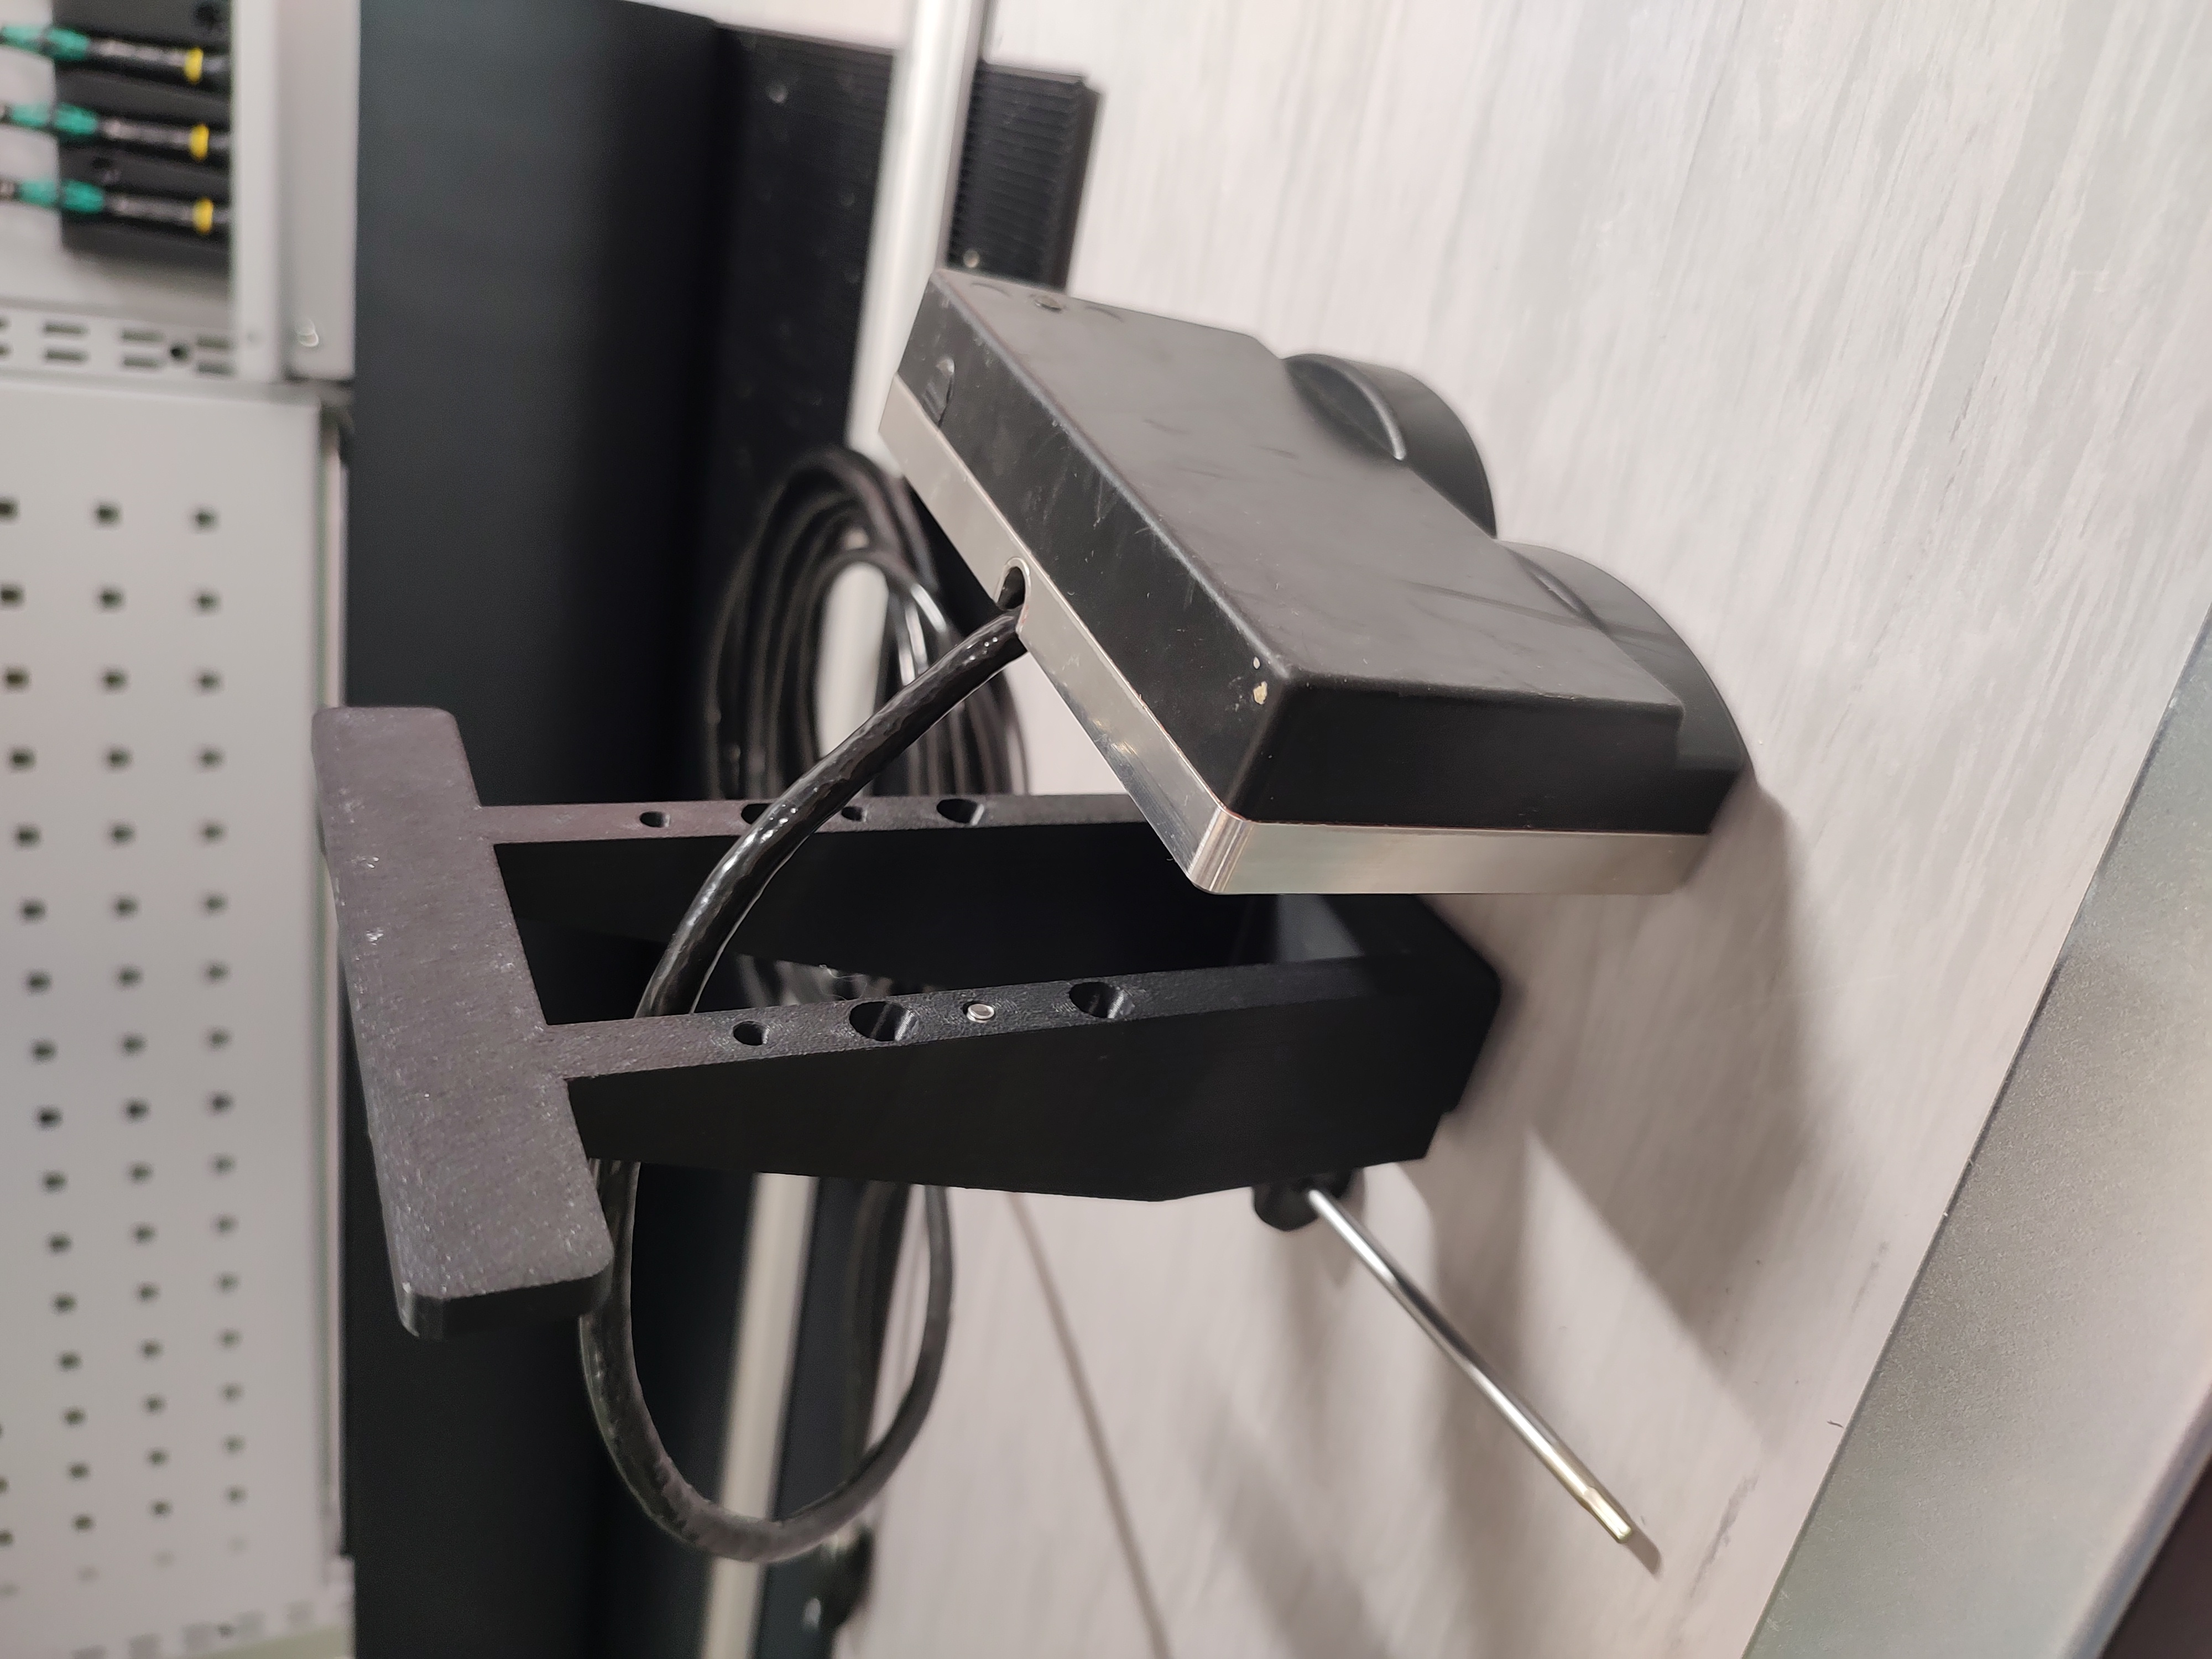
The Sonar 3D-15 needs to be physically attached to the Chasing ROV. A possible option on how to do this will be listed here. There are many different approaches to achieve this, and this approach is only listed to provide an idea.
-
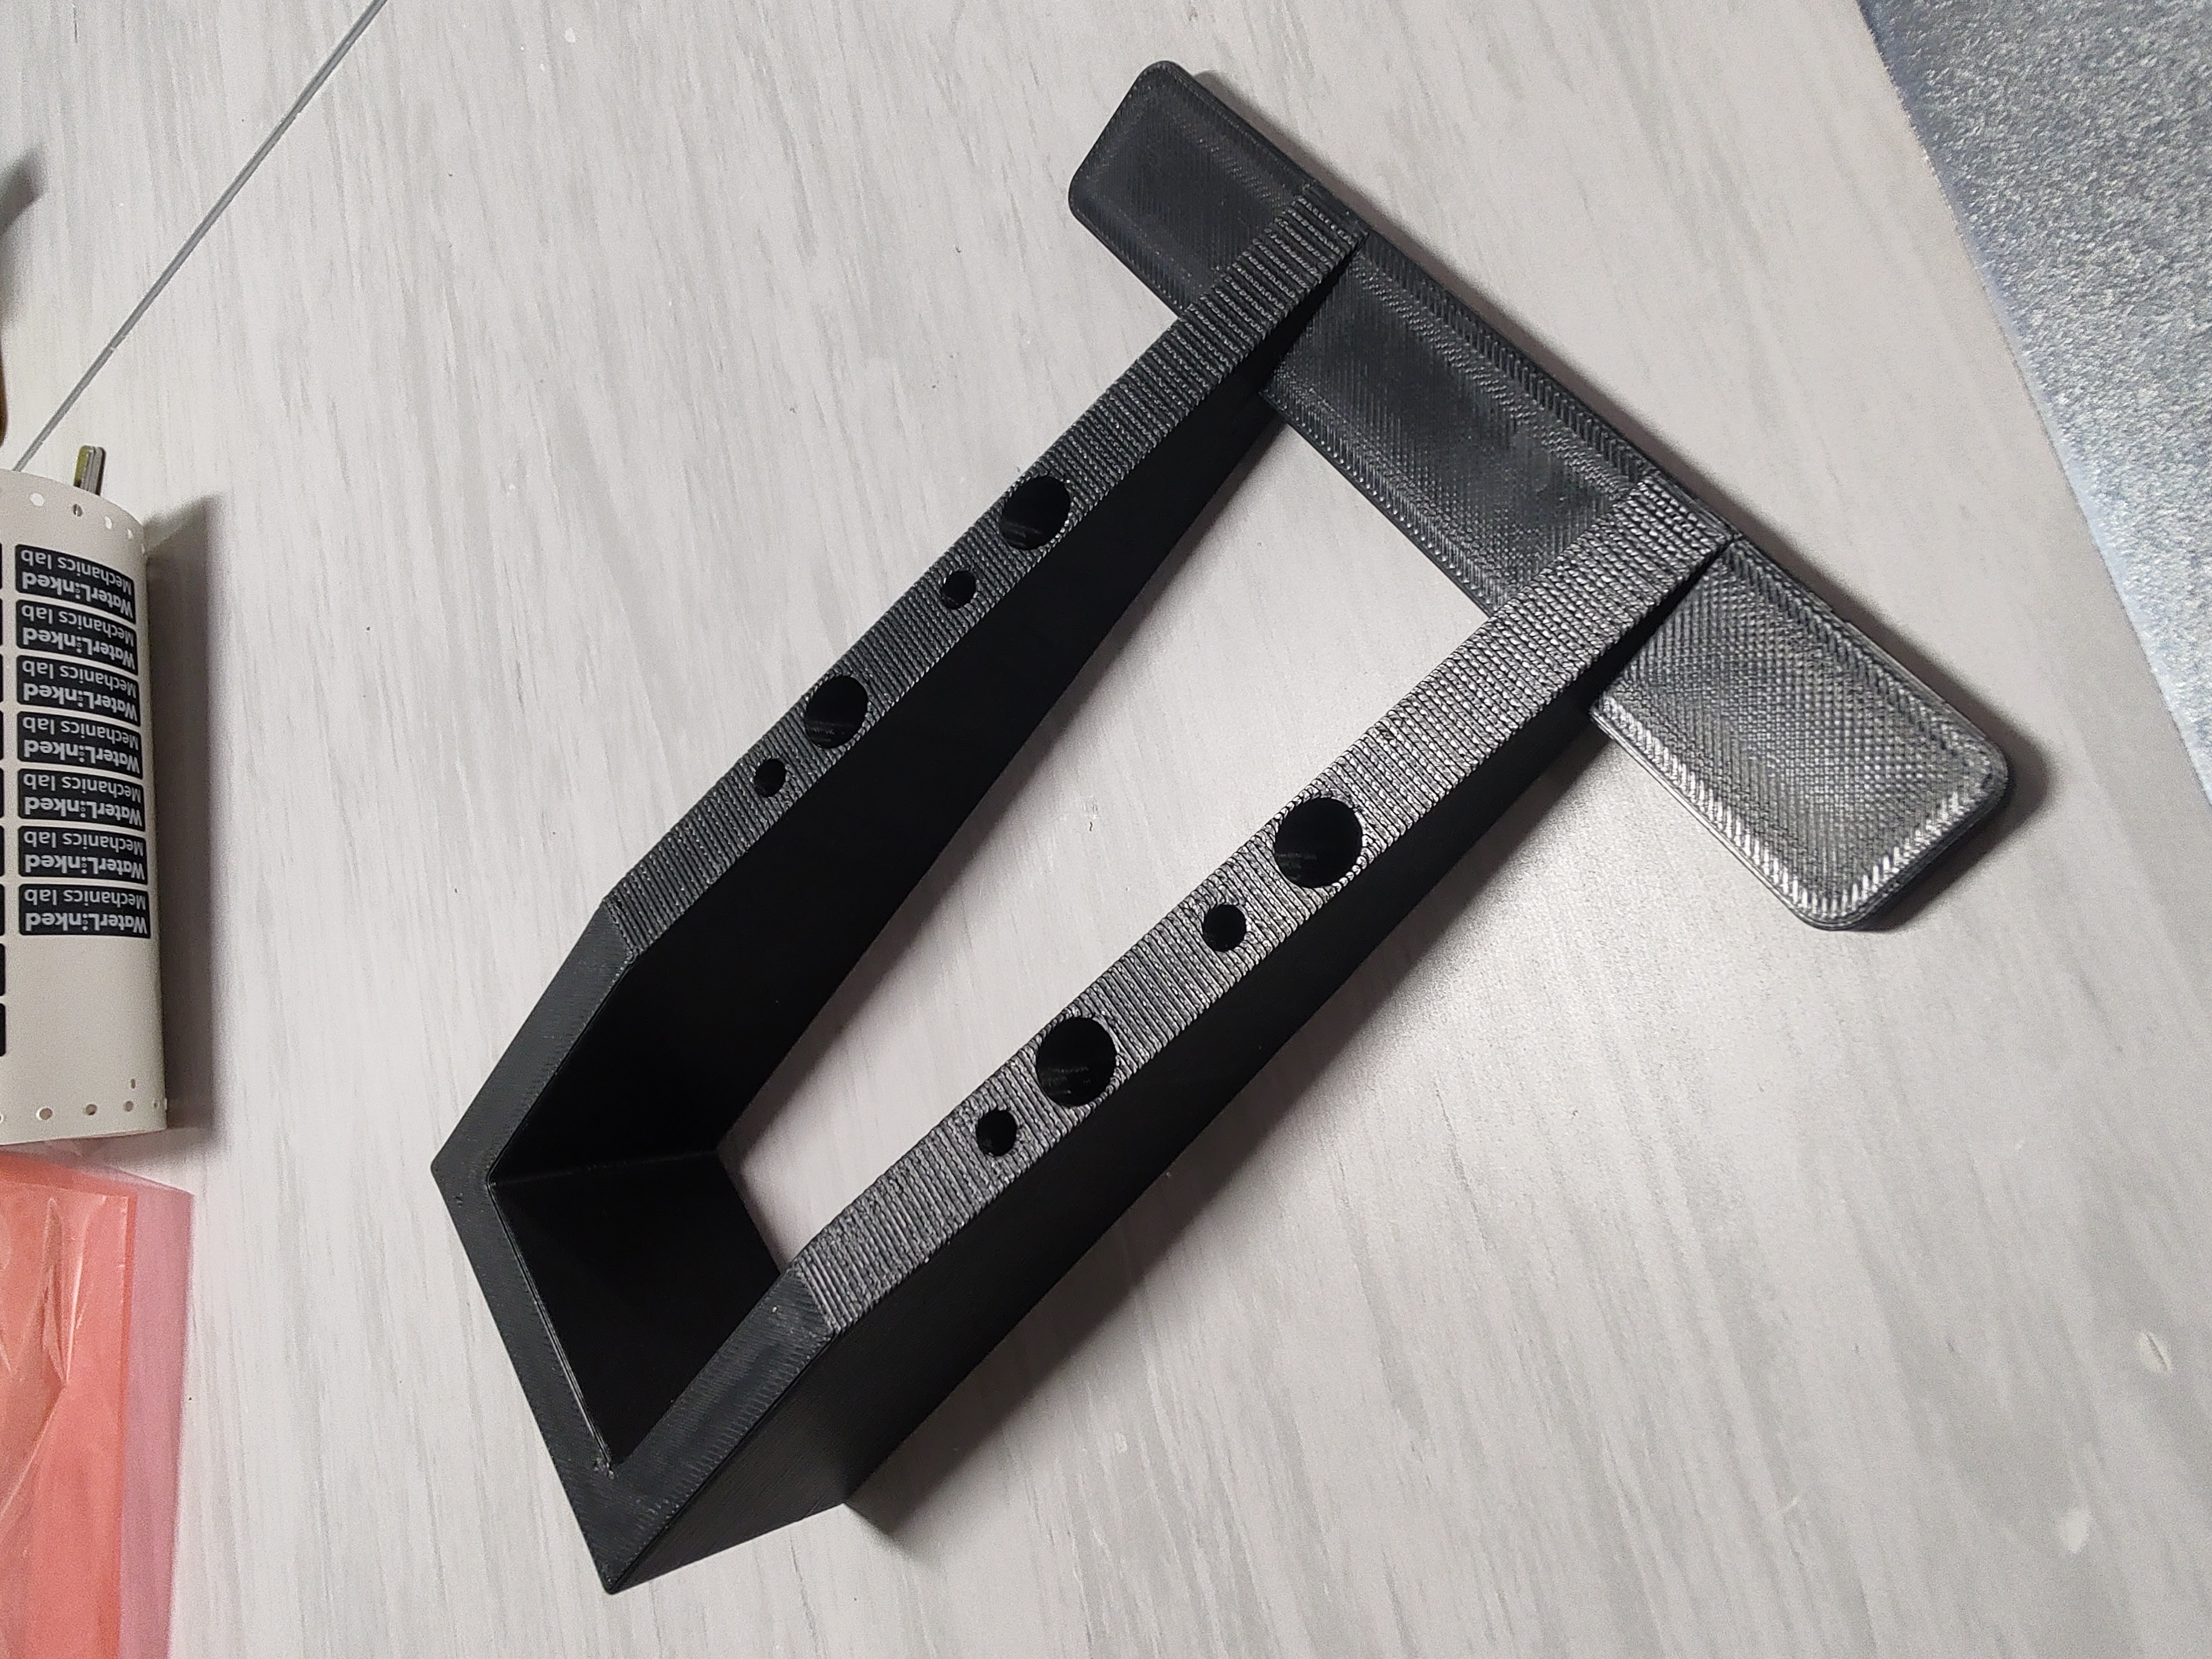
Create or find a suitable mount
An example 3D step file of a mount is found here: Download 3D step file
Note
Choose a 3D print material that can withstand the expected operating conditions.
-
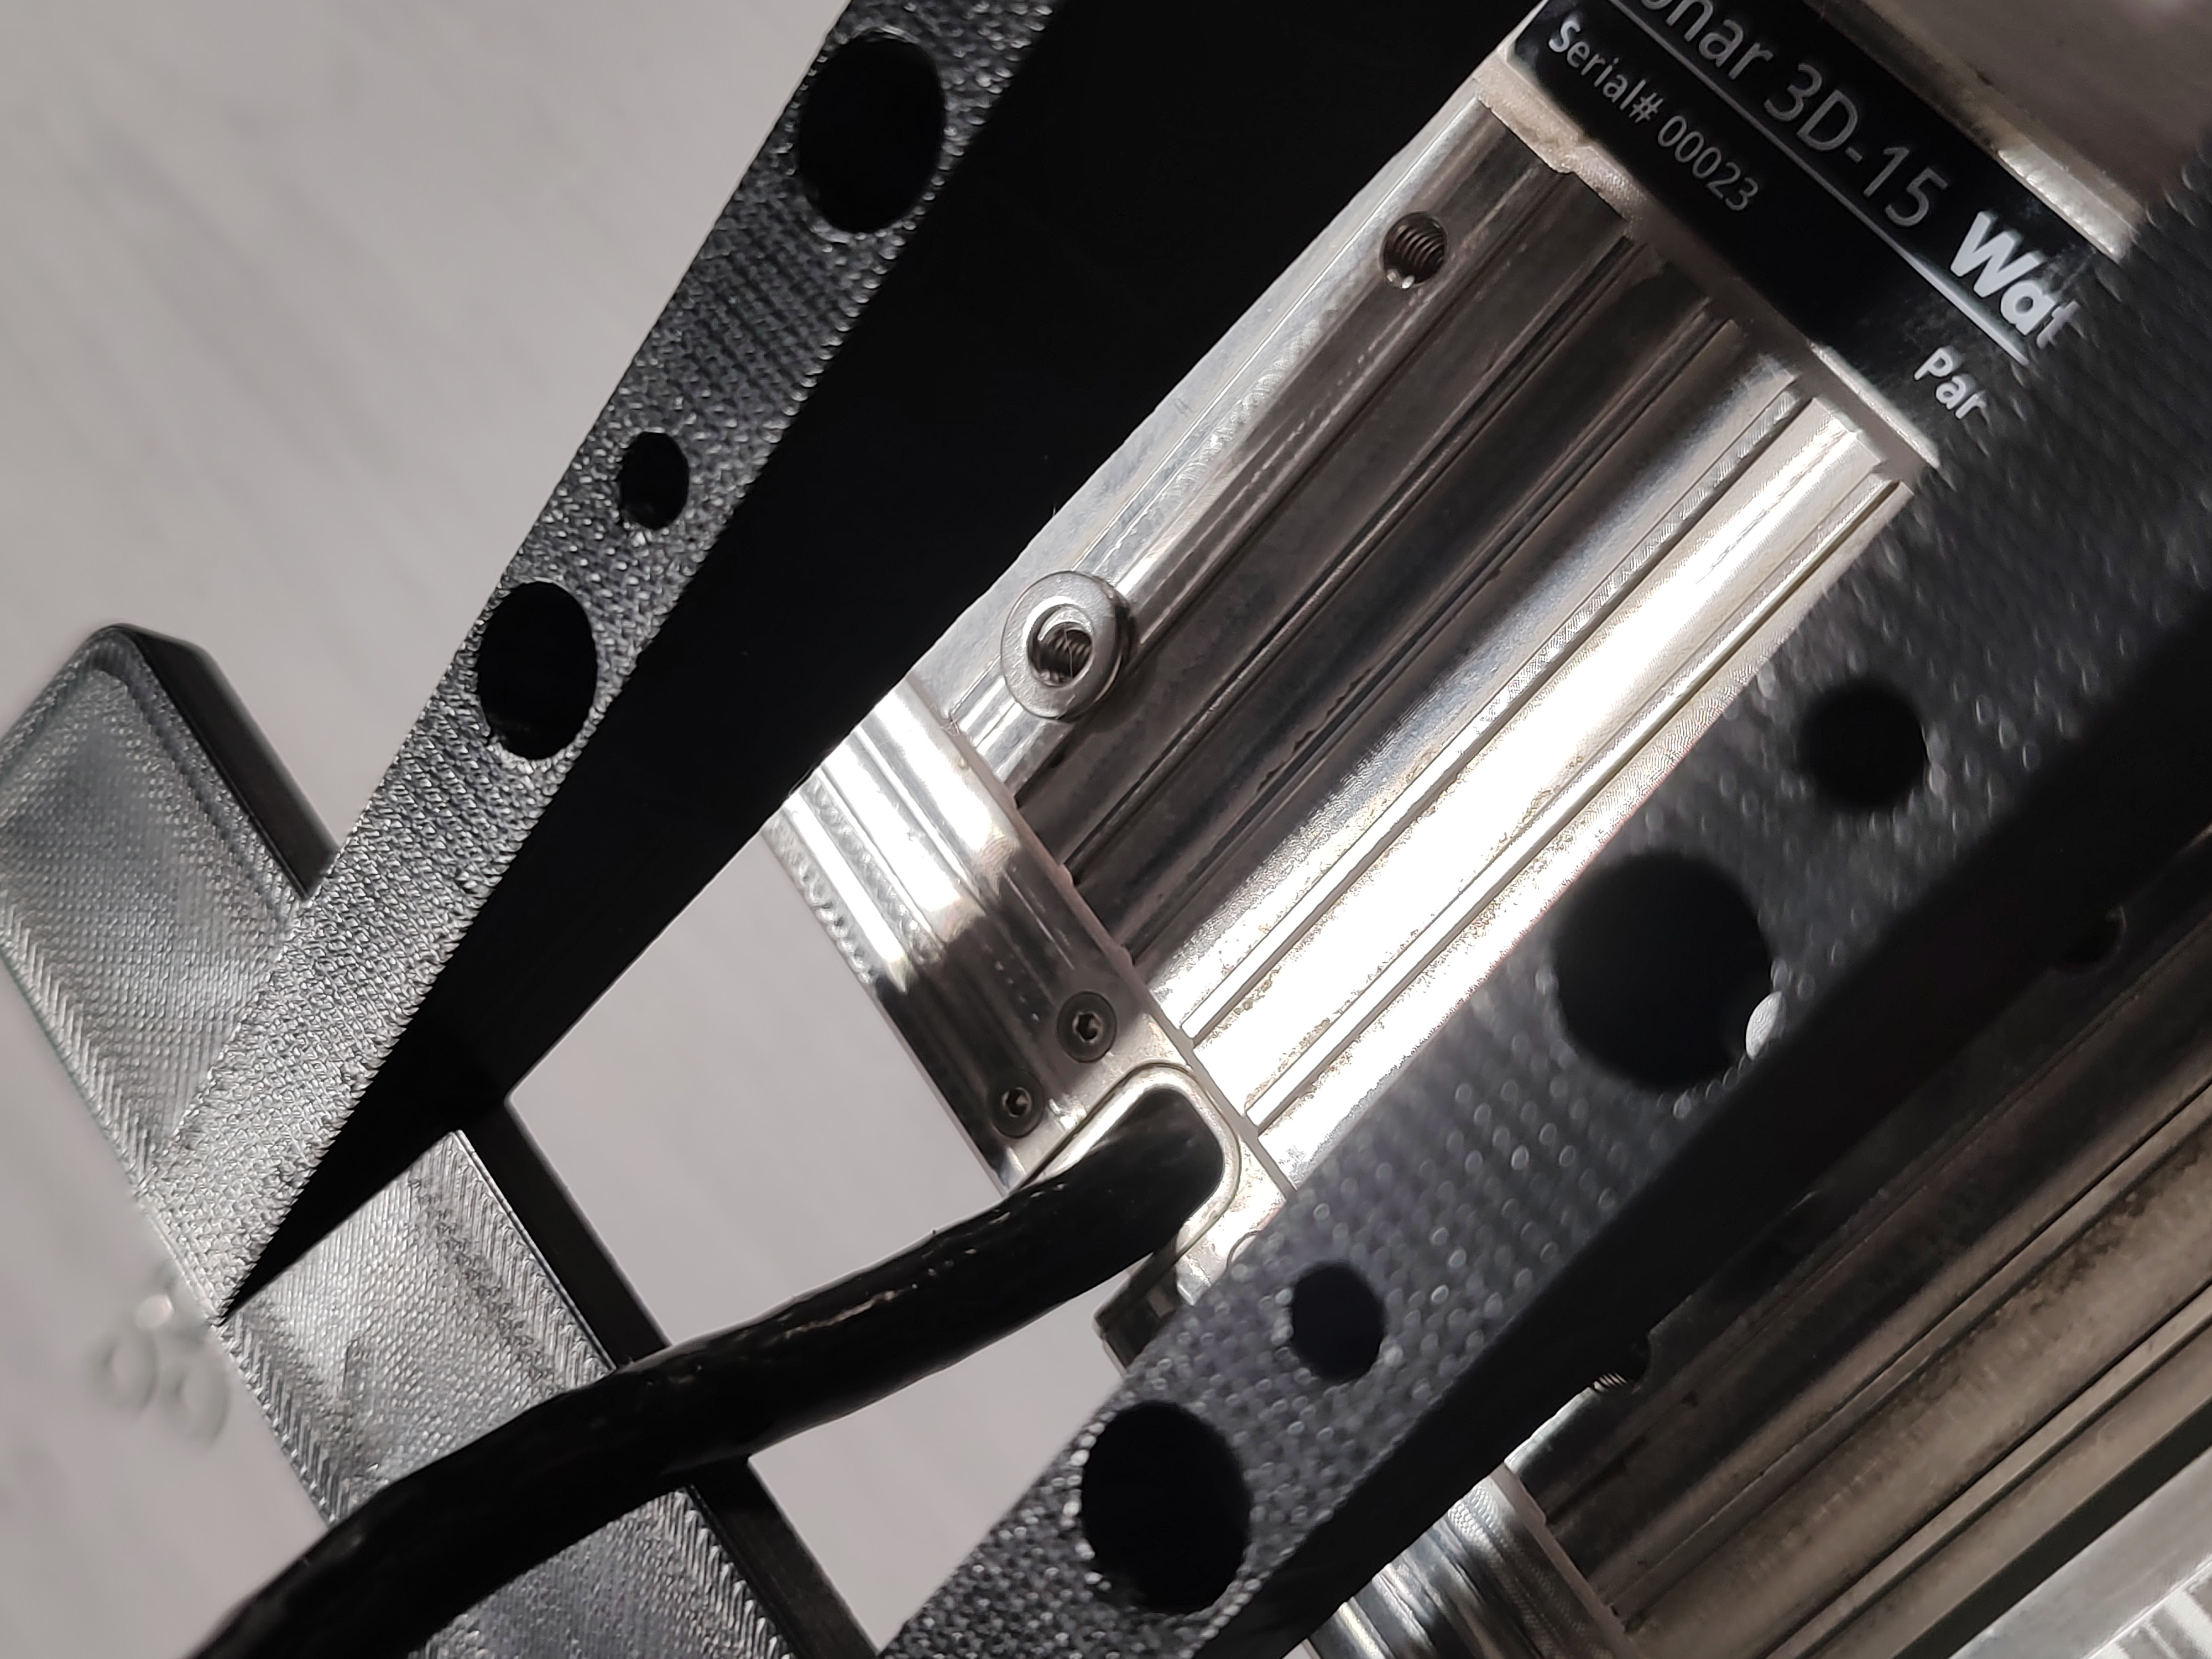
Identify the screws and mount to use
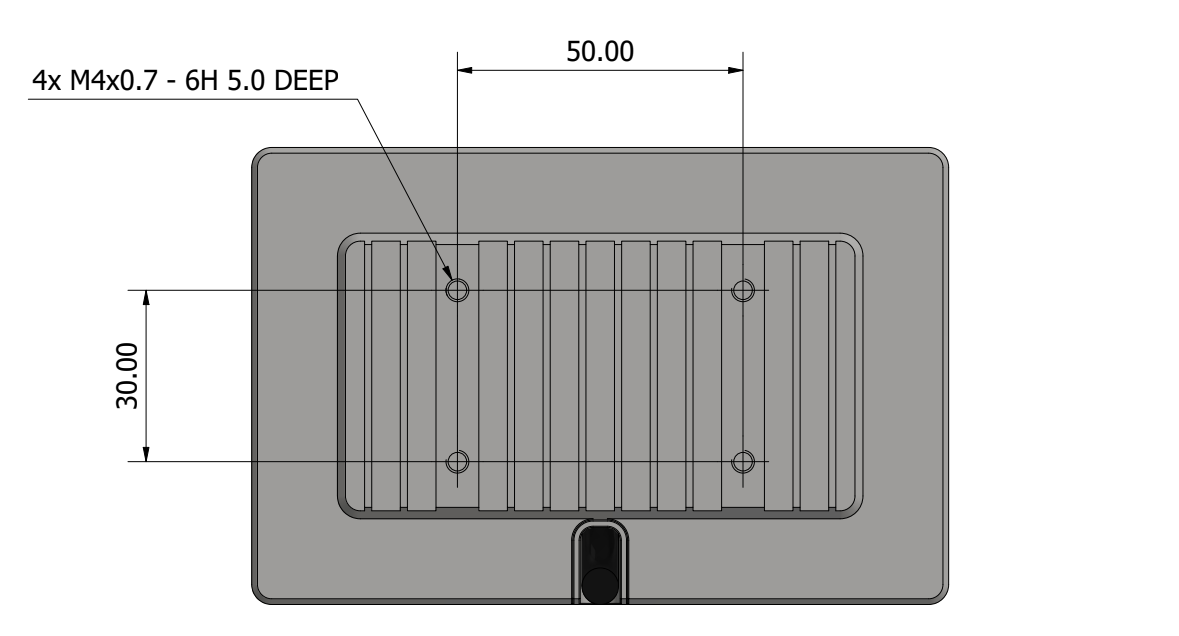
The four screw holes on the Sonar 3D-15 are sized
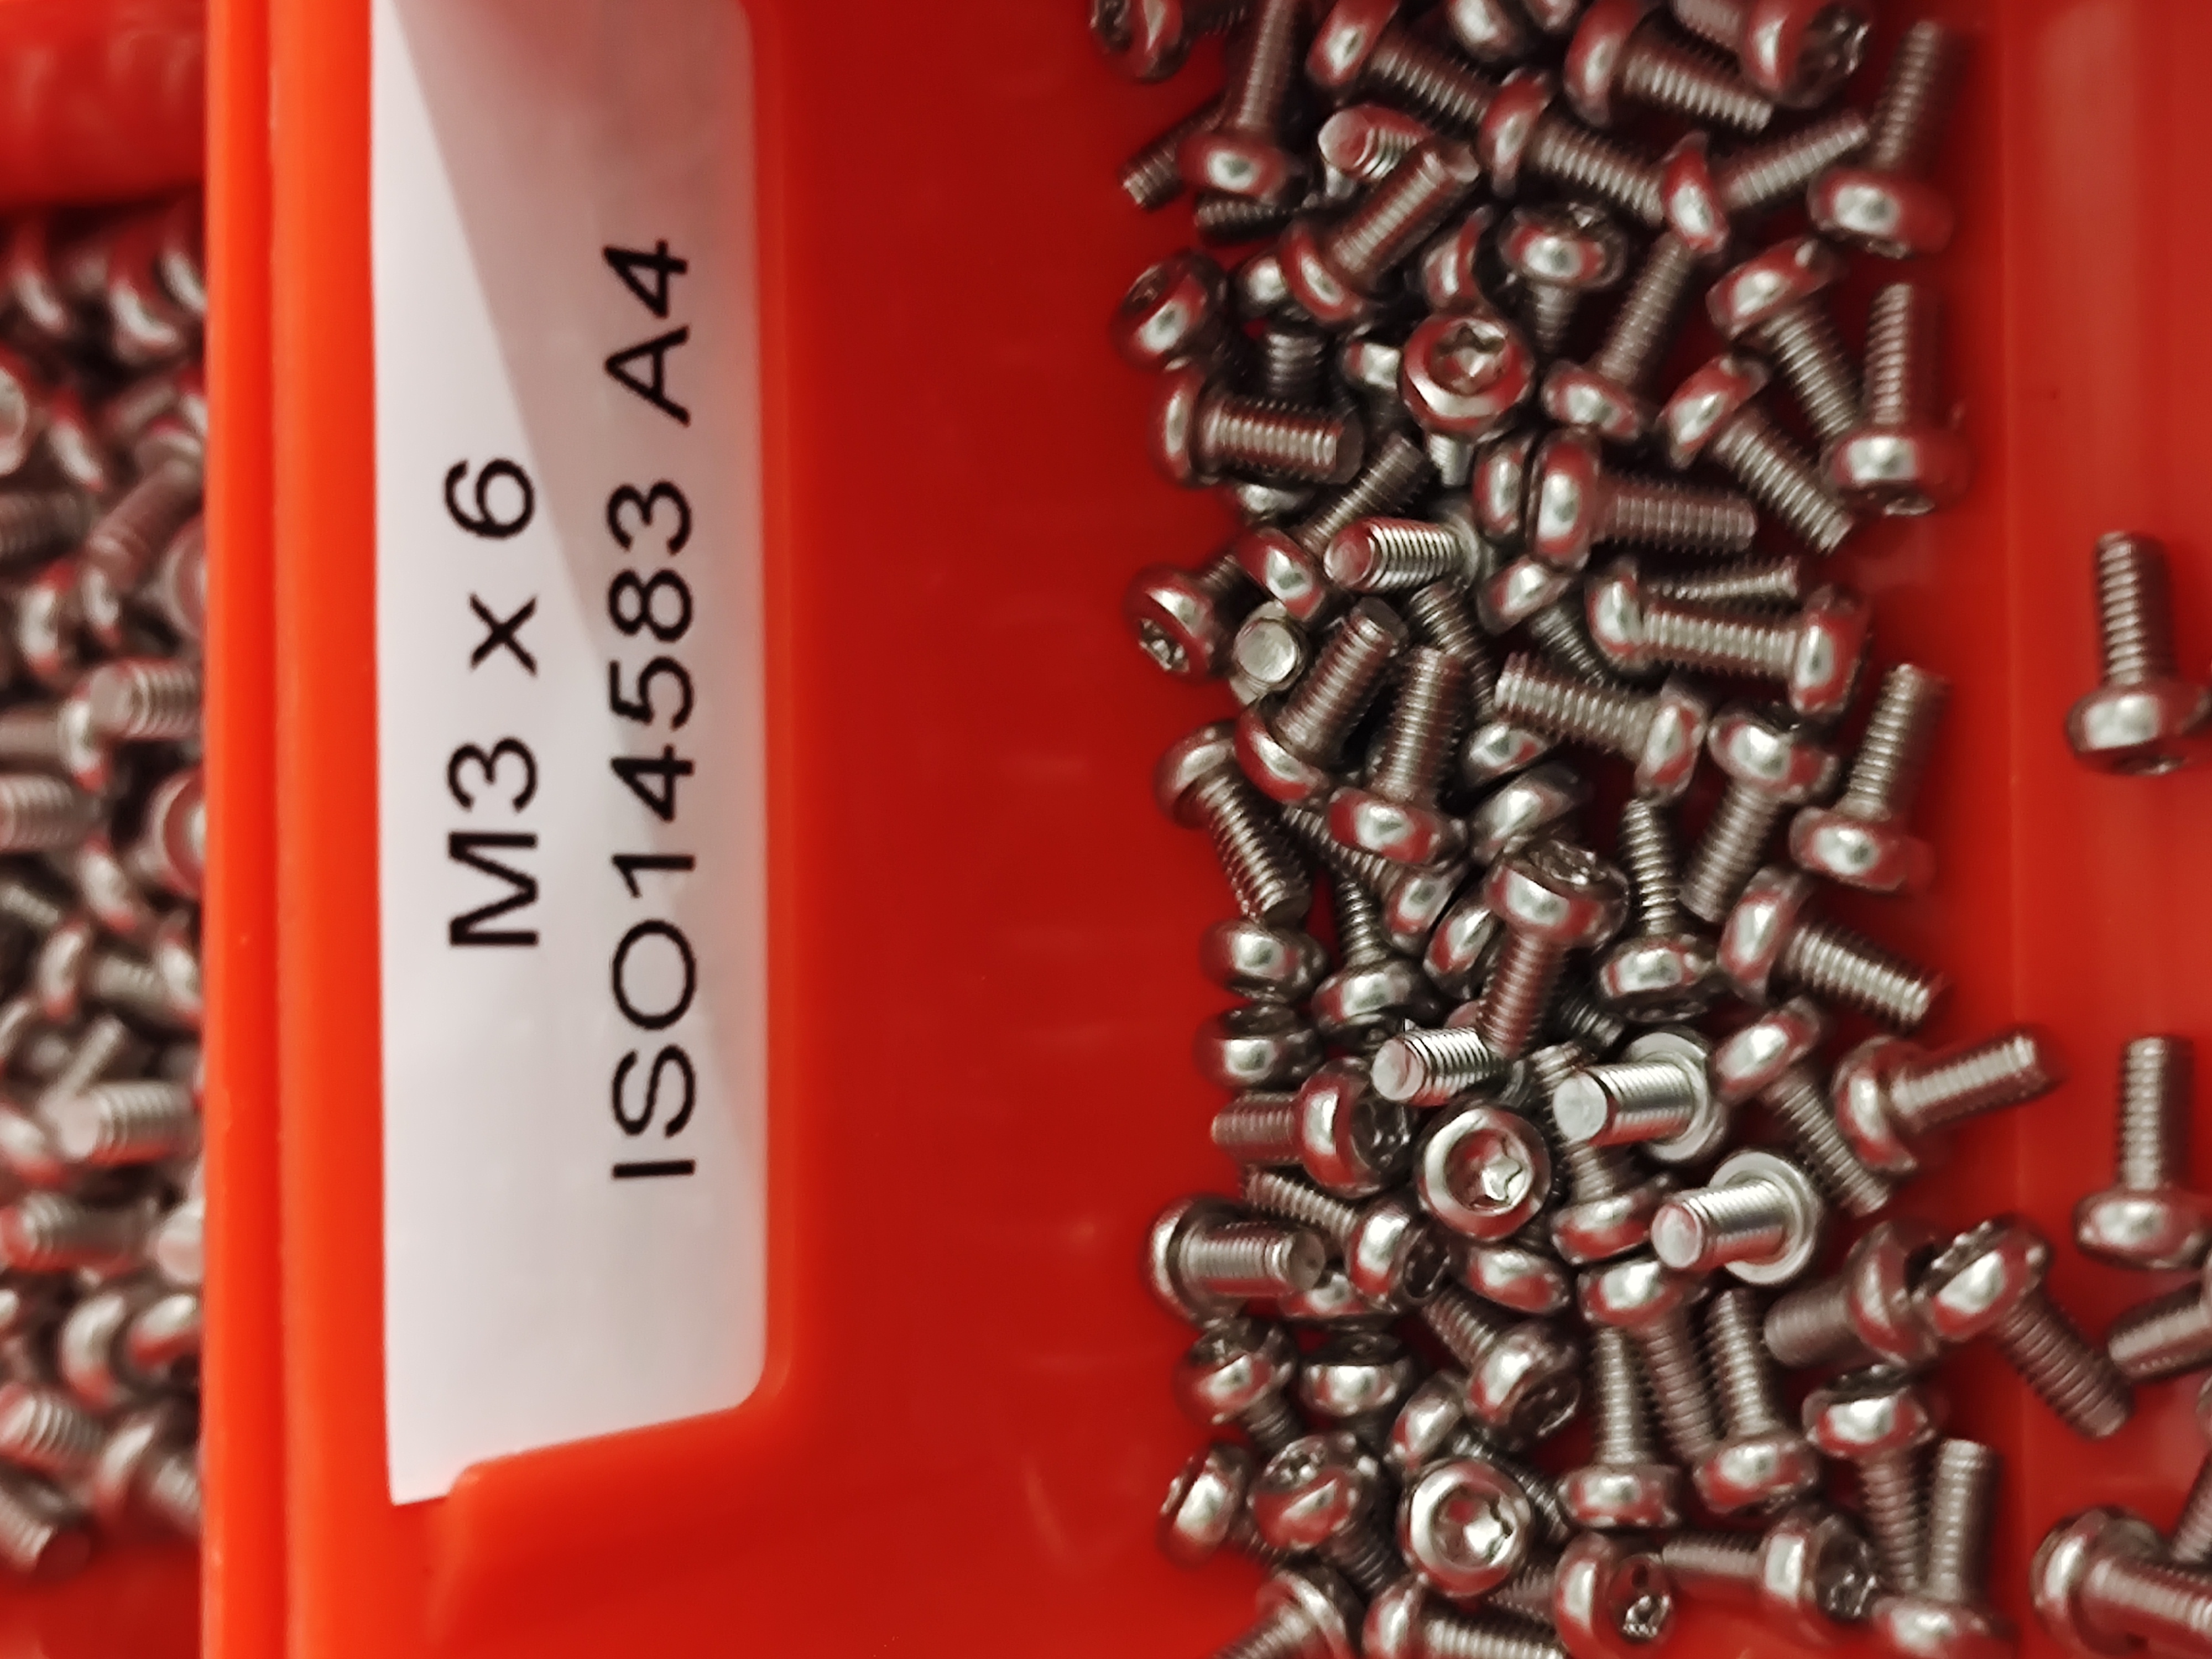
[M4x0.7-6H 5.0 DEEP]. Choose a screw to fit this in addition to your chosen mount. Use a M4 Washer if necessary. For the Mounting Bracket plate, M3 screws is needed.For the example mount (as the given 3D print file), the following screws and washers are sufficient:
- 4x
M3x6.0mm ISO 14583 A4screws - 4x
M4x12mm ISO 14583 A4screws - 4x
M4 ISO 7089 A4Washers
Warning
To avoid damaging the Sonar 3D-15, make sure the screws are not too long.


- 4x
-
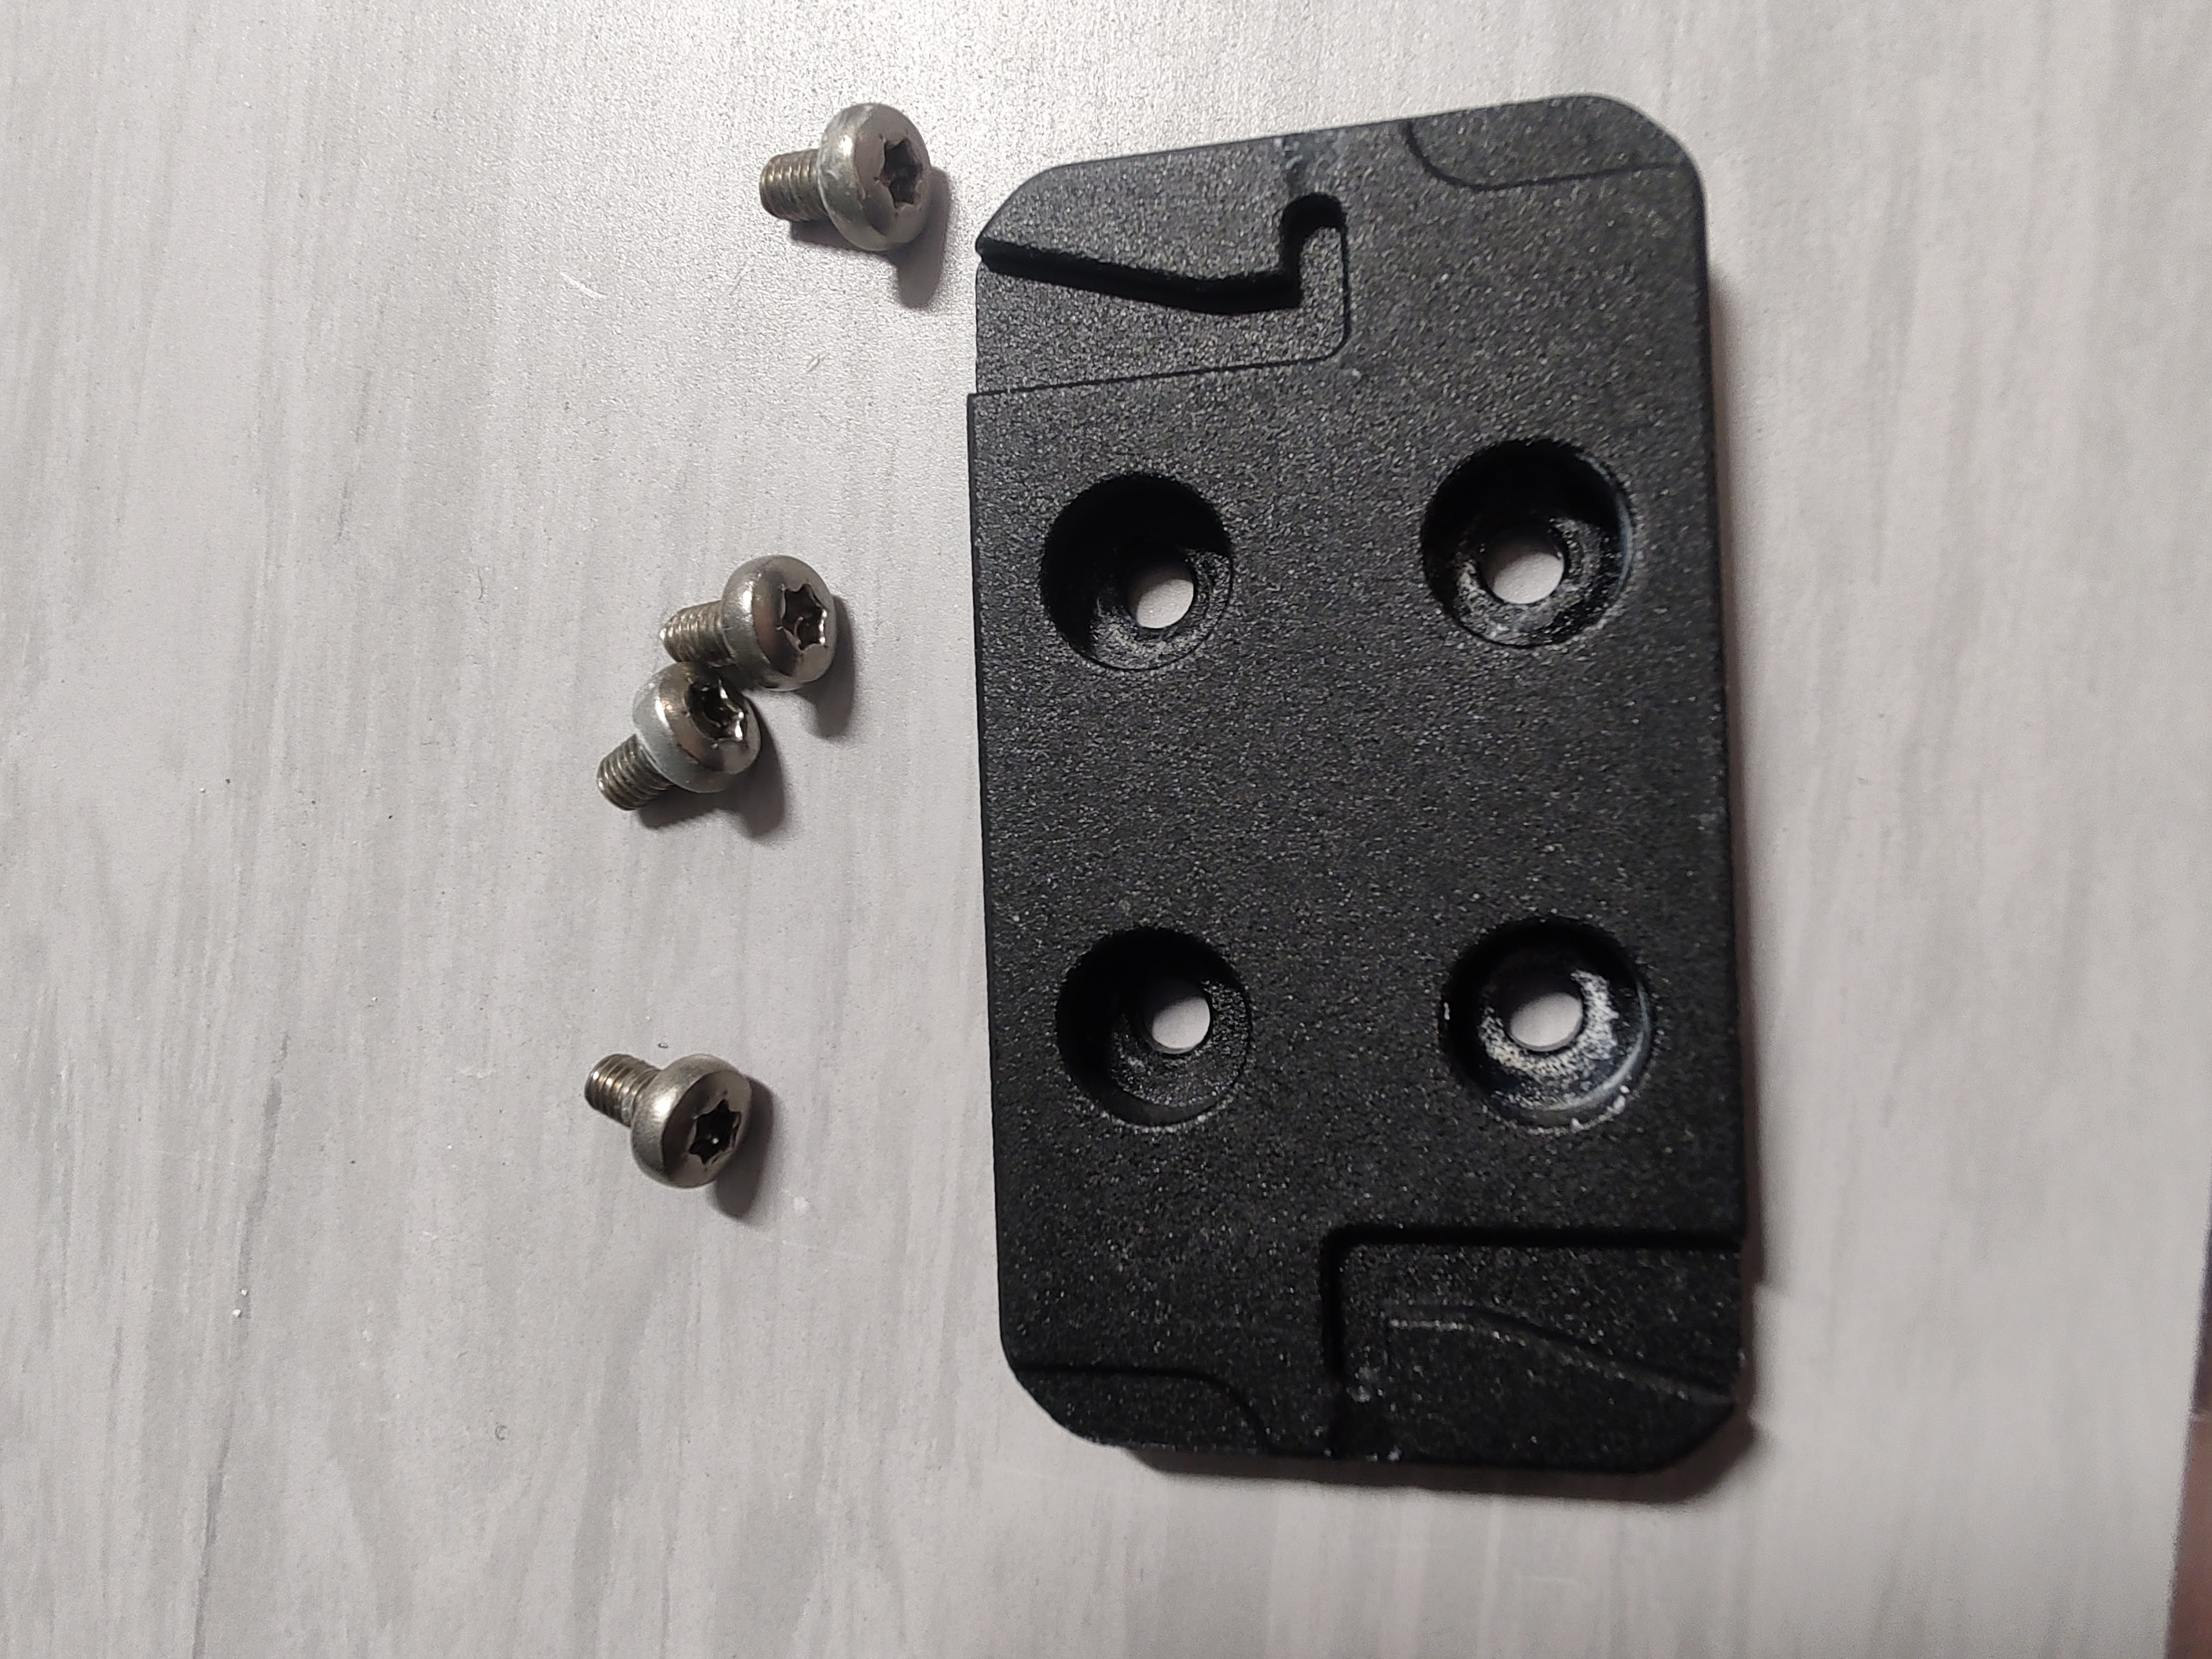
Attach the CHASING Quick Mounting Bracket plate to the Mount
Attach the CHASING Quick Mounting Bracket plate to the Mount like in the images below, using the M3 screws that was provided when purchased from Chasing.
-
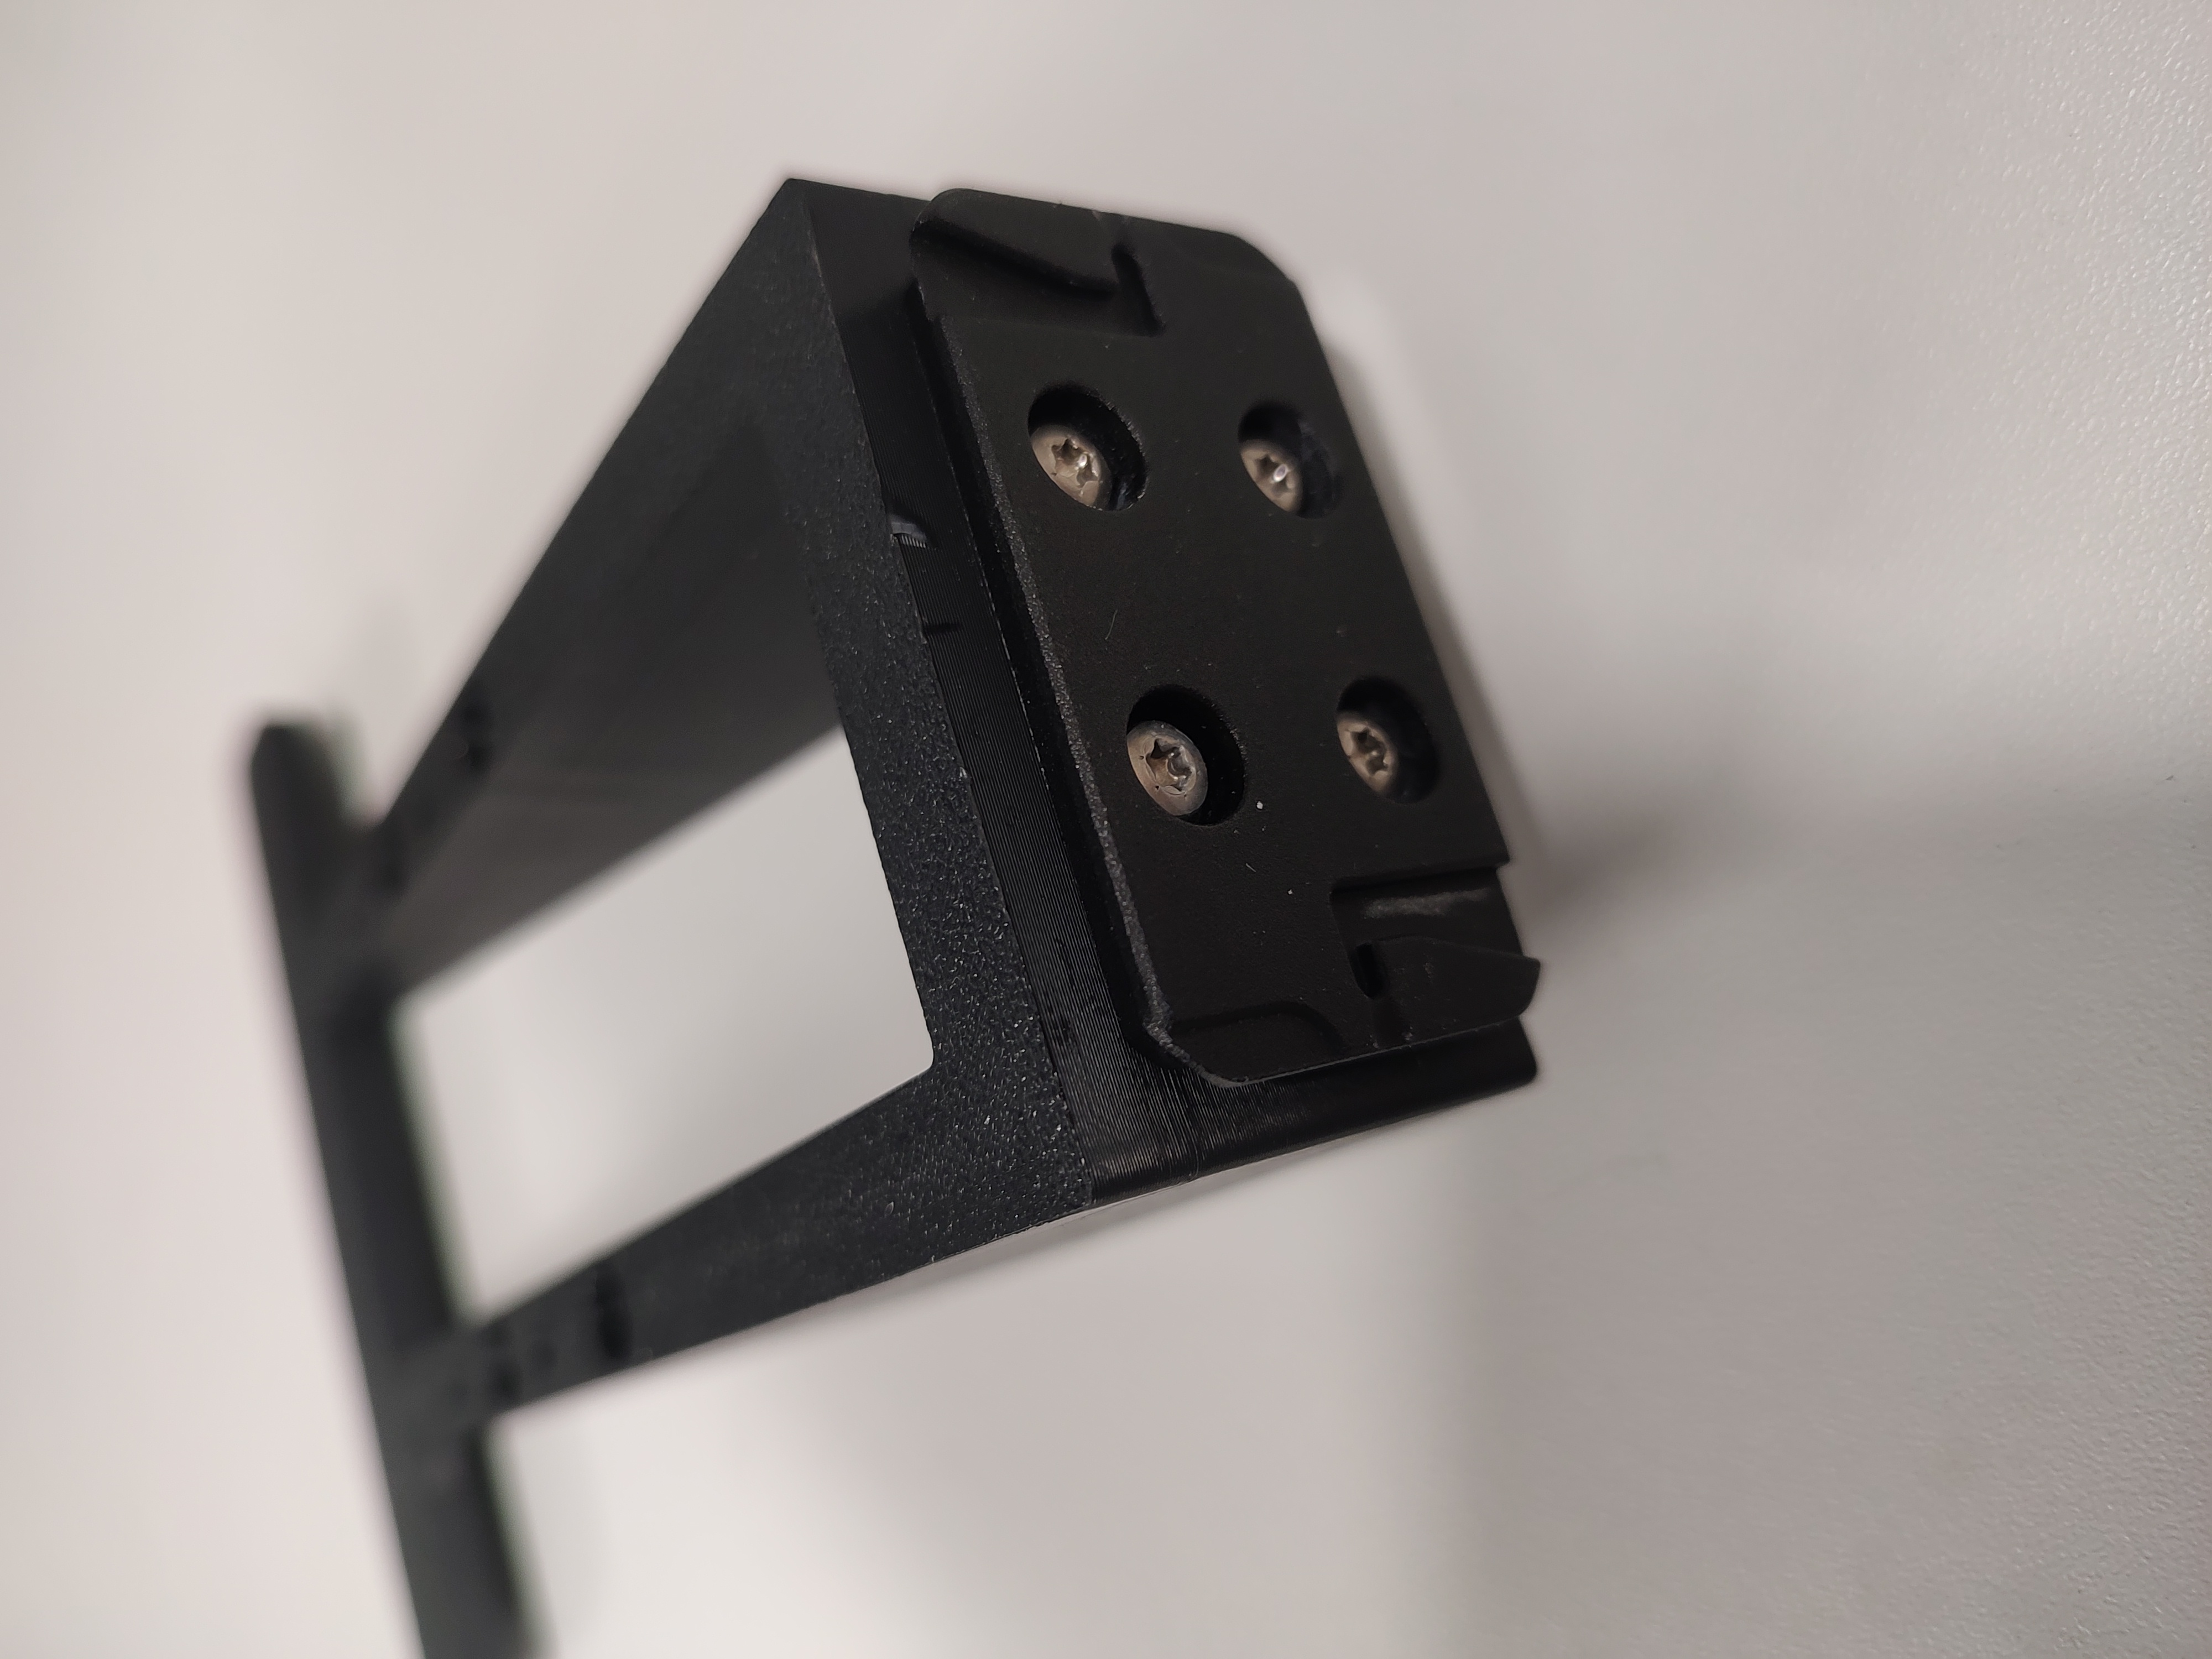
Attach the mount to the Sonar 3D-15
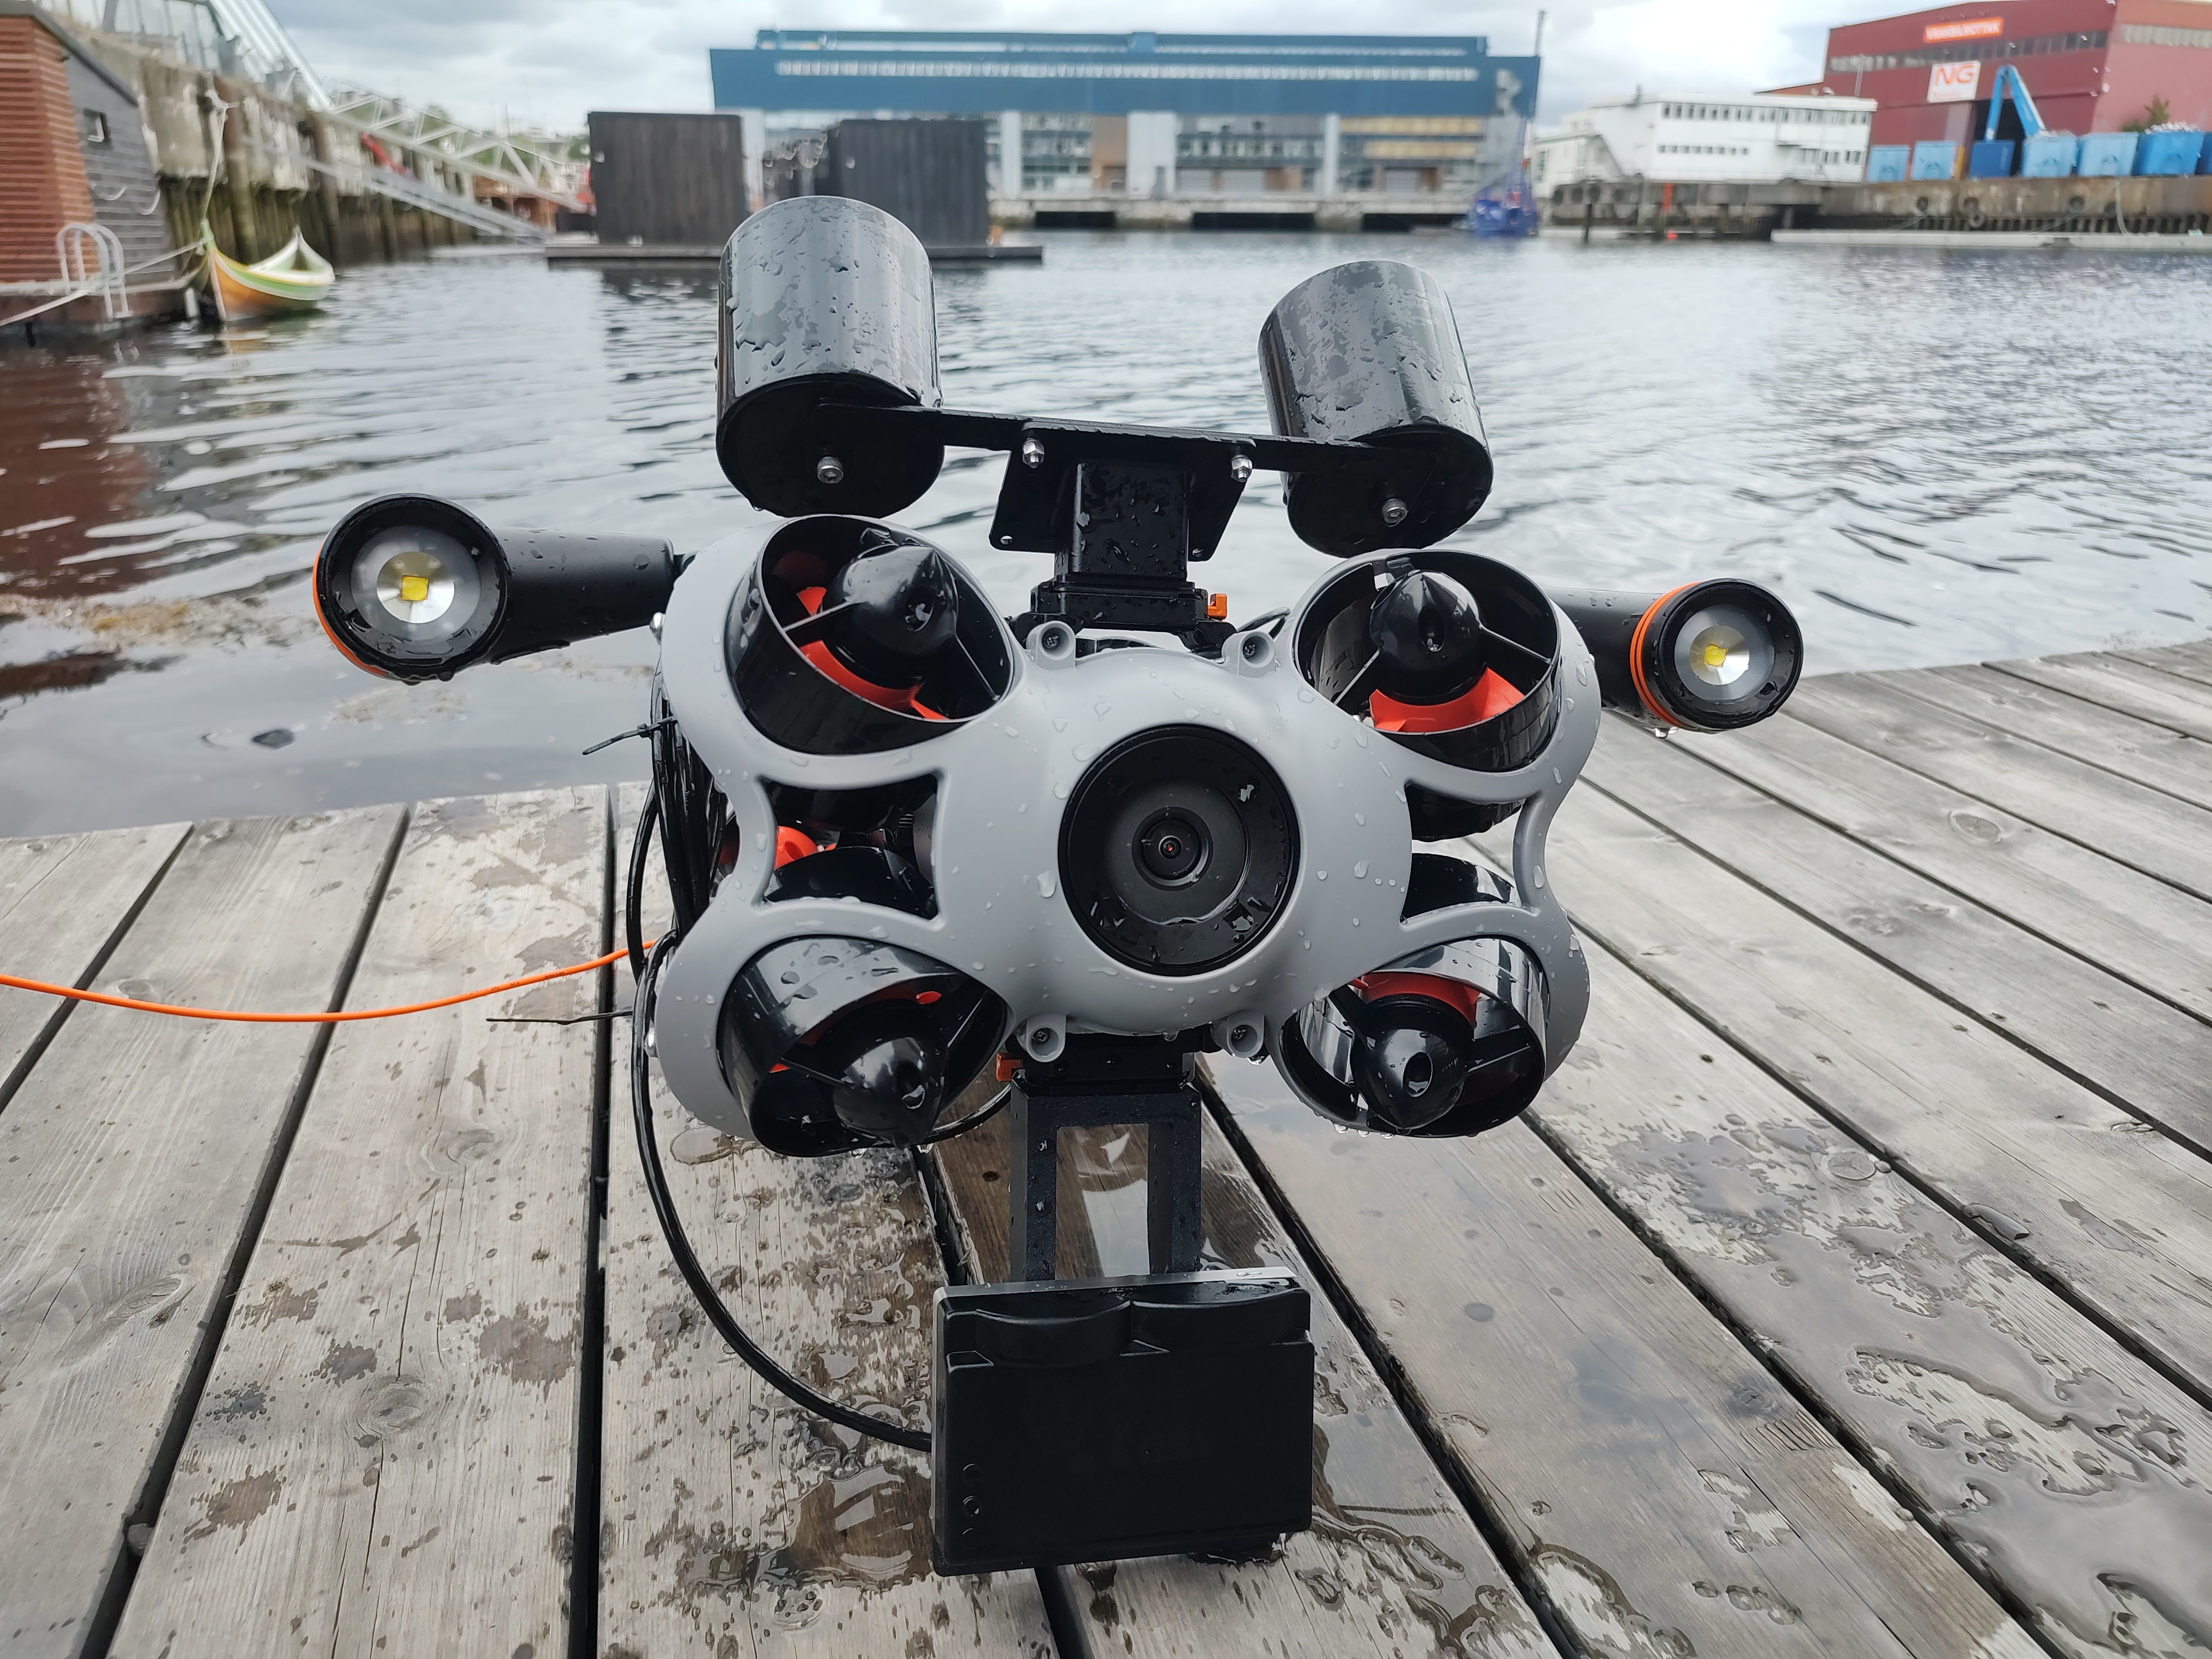
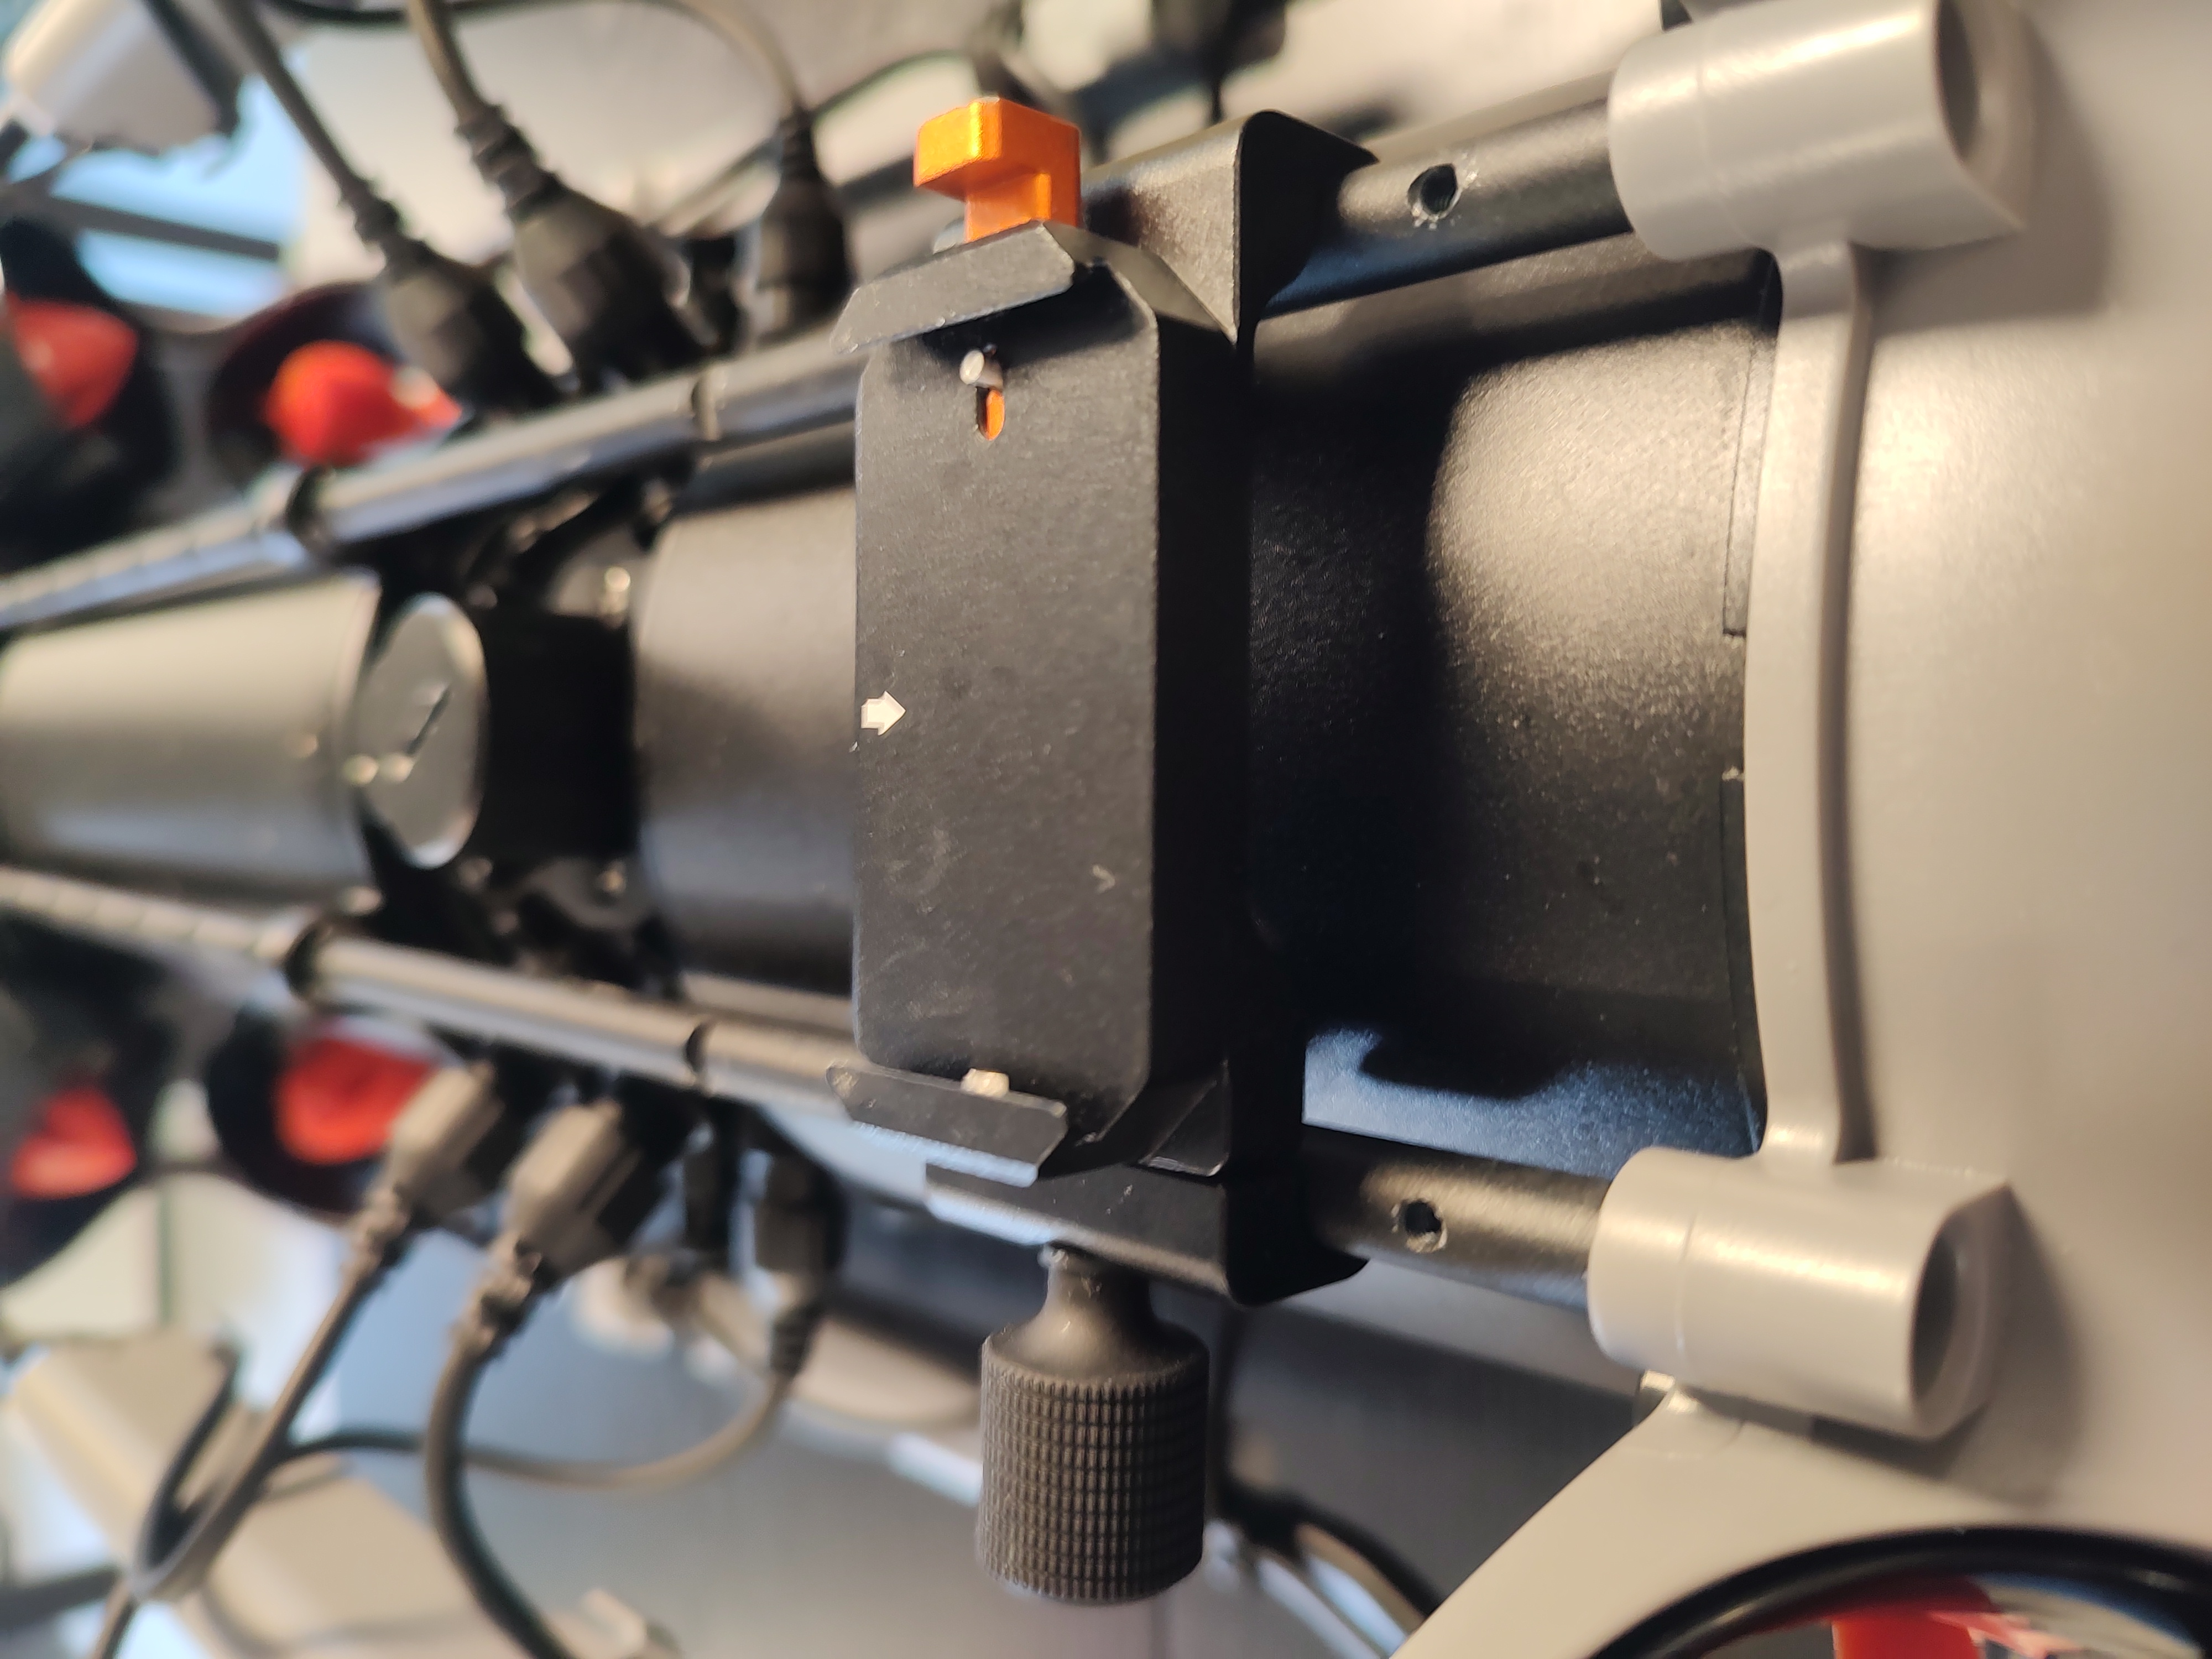
We recommend attaching the Sonar 3D-15 to the attachment rail underneath at the front of the Chasing, so that the Sonar 3D-15’s field of view is not obstructed.
Tip
Attach buoyancy module to the top attachment rail on the front to counteract the additional downward force caused by the Sonar 3D-15.
-
Attach the mounted Sonar 3D-15 to the Chasing ROV
Use the CHASING Mounting Bracket to attach the mounted Sonar 3D-15 to the ROV.

Note
Make sure the Sonar 3D-15 and cable is neatly and securely attached before use.
Connection steps🔗
1. Connect the cable🔗
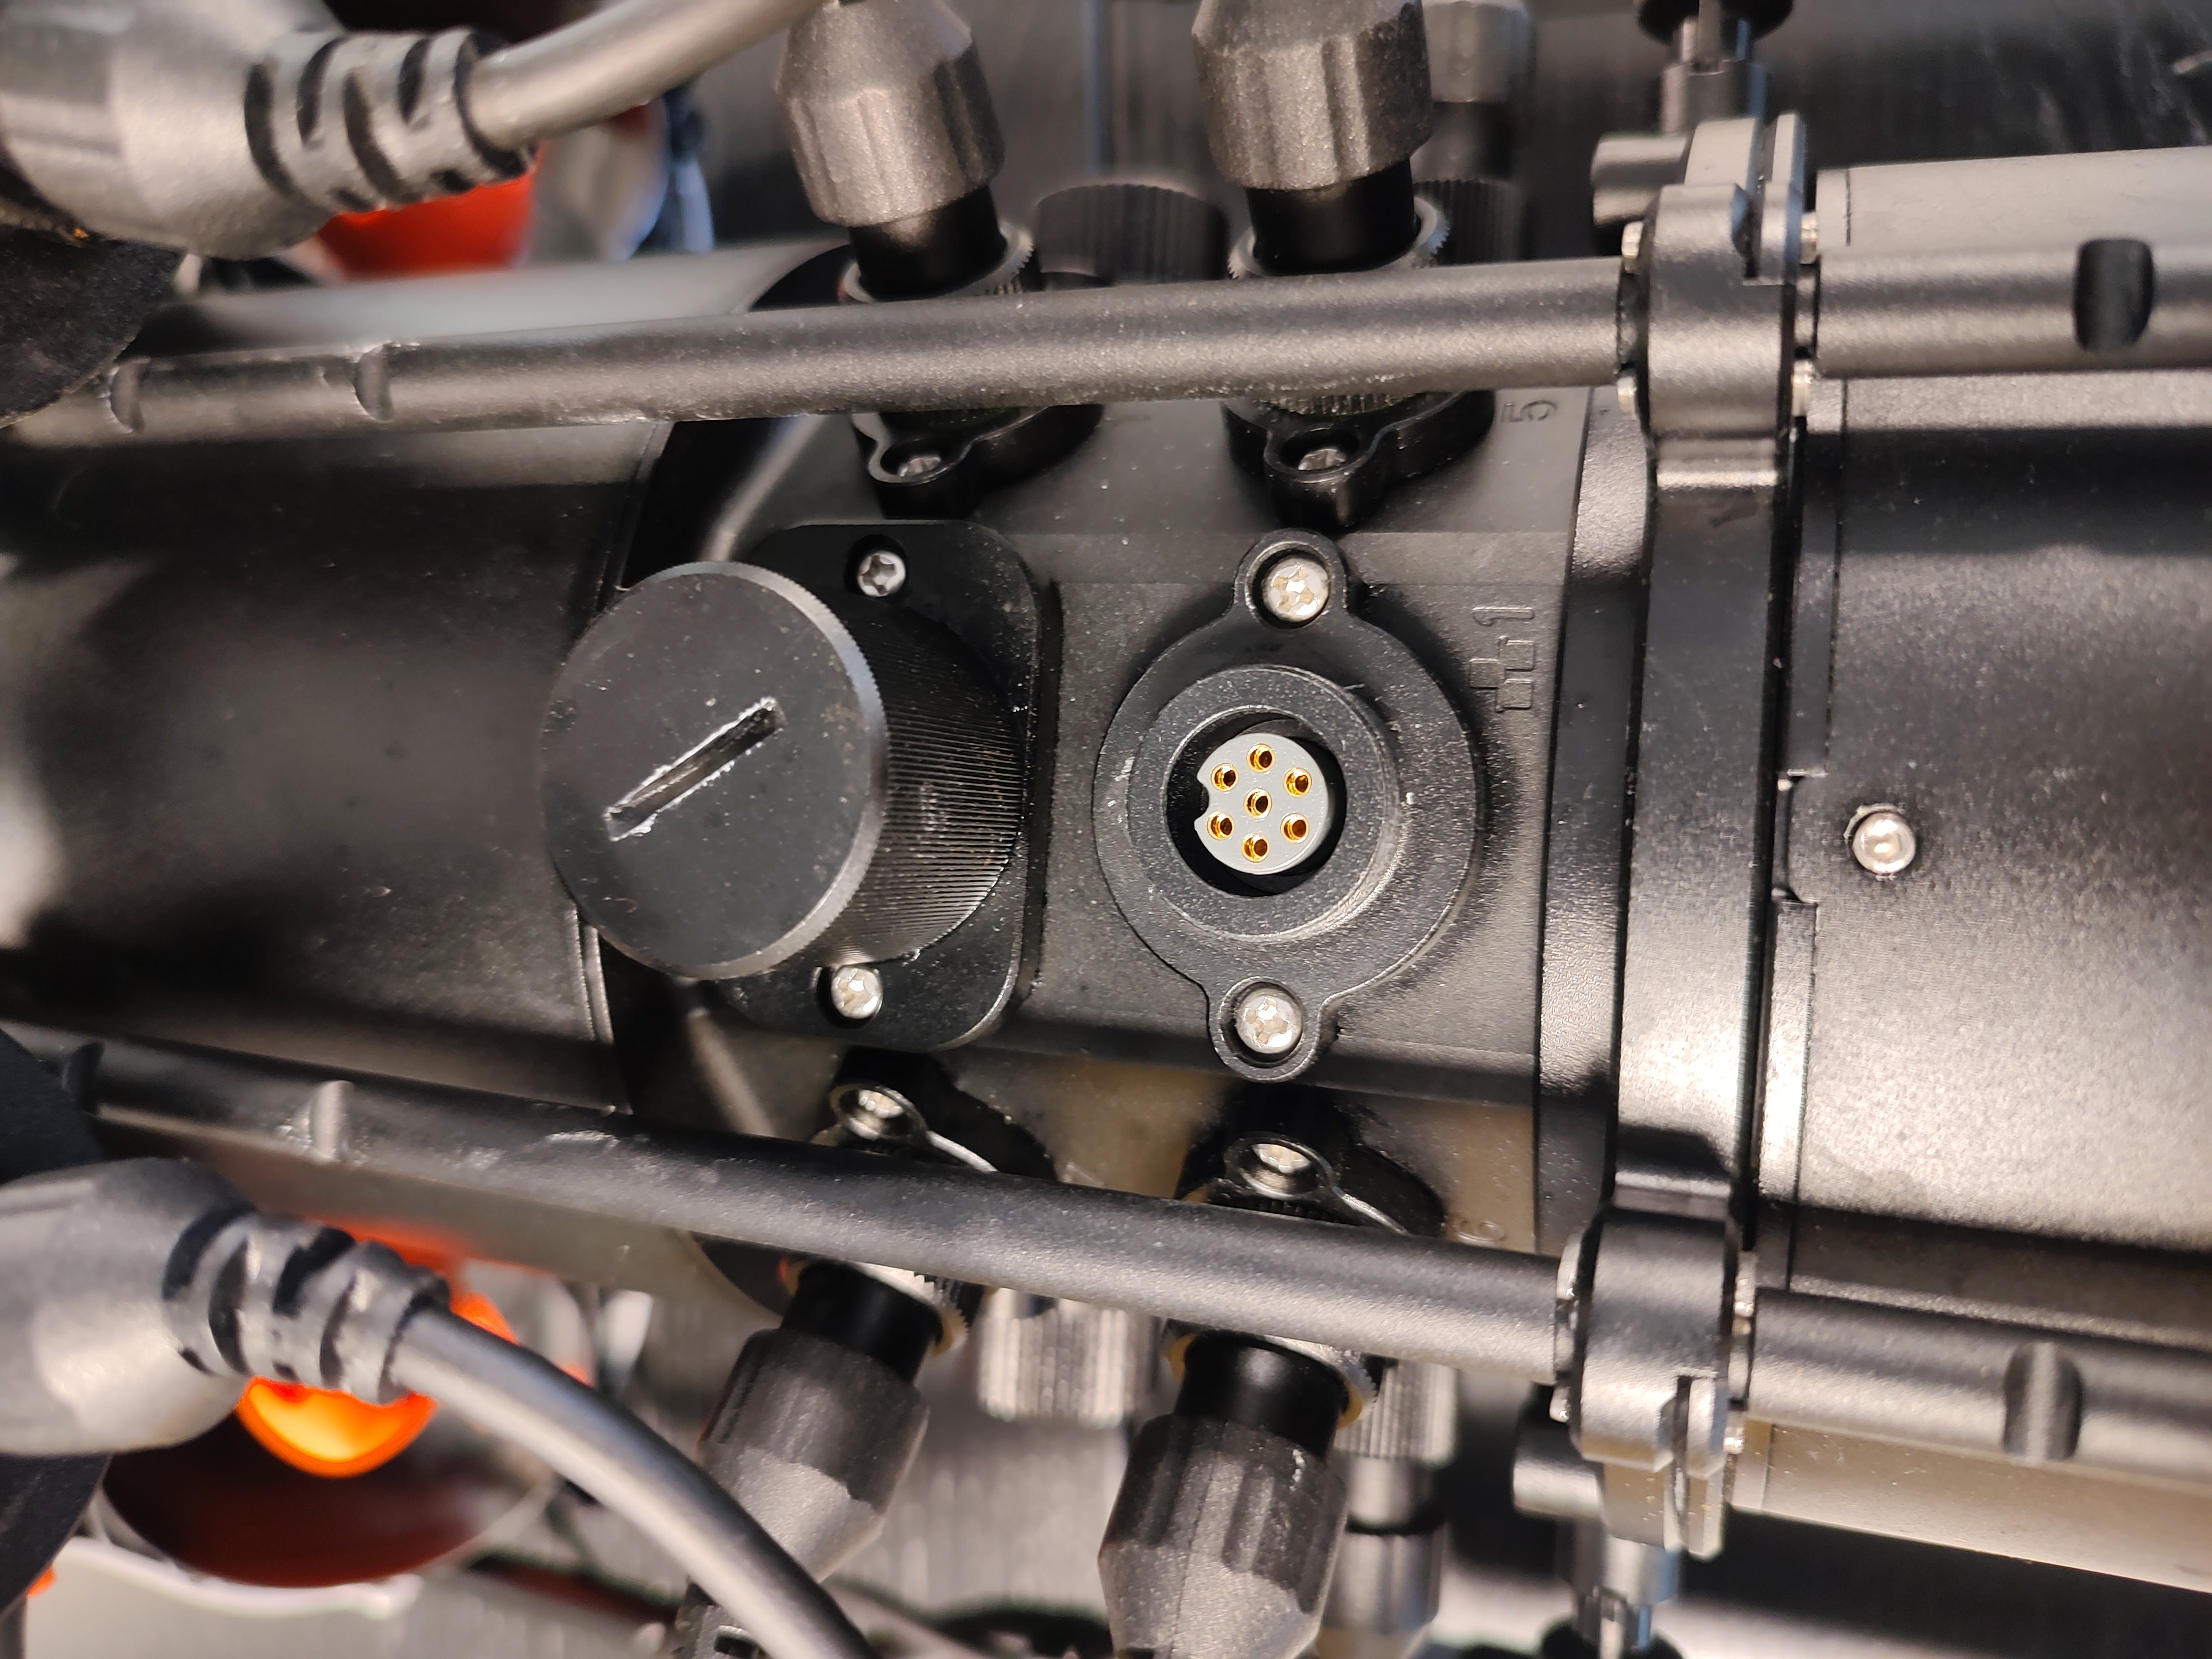
Connect the Sonar 3D-15 cable into one of the free ethernet ports on the Chasing.
2. Turn on the ROV🔗
Use the power switch on the Chasing controller and let the ROV boot up. This activates the Chasing Wi-Fi network.
Warning
To avoid potential power hazard or errors, make sure every cable is well connected before you turn on the controller. Do not connect sensors to the Chasing while the power is on.

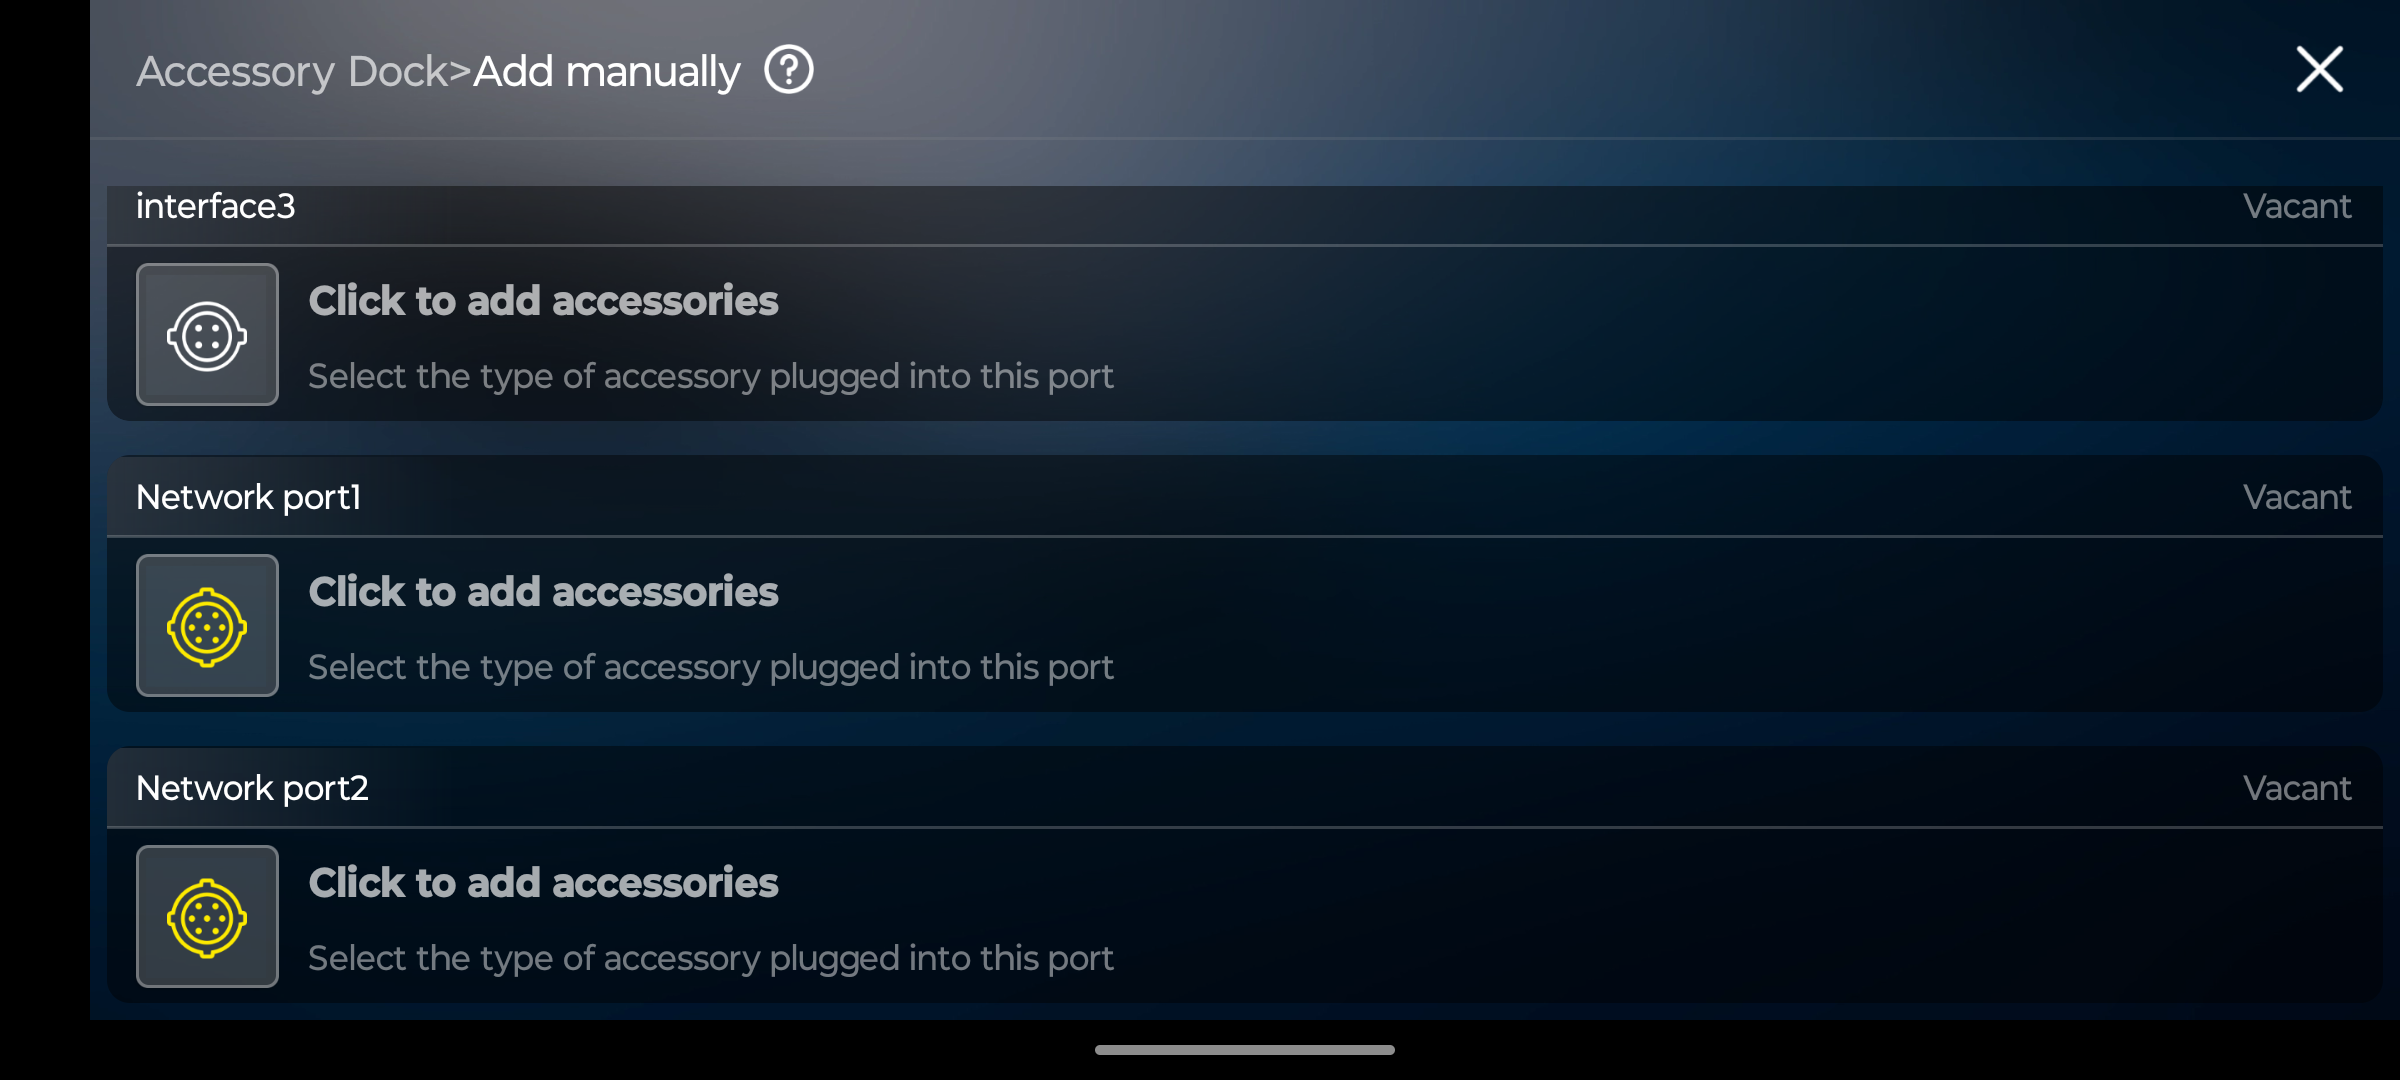
3. Add the Sonar 3D-15 device🔗
Connect your phone to the Chasing Wi-Fi network from the Wi-Fi settings on your phone. Go into the CHASING GO1 app to activate the ROV. Your device will likely prompt you to confirm the connection since the Wi-Fi has no internet access. You must accept this to proceed.
Enter CHASING GO1 and click on the puzzle piece in the bottom right. Here we will add the Sonar 3D-15 as an external device.

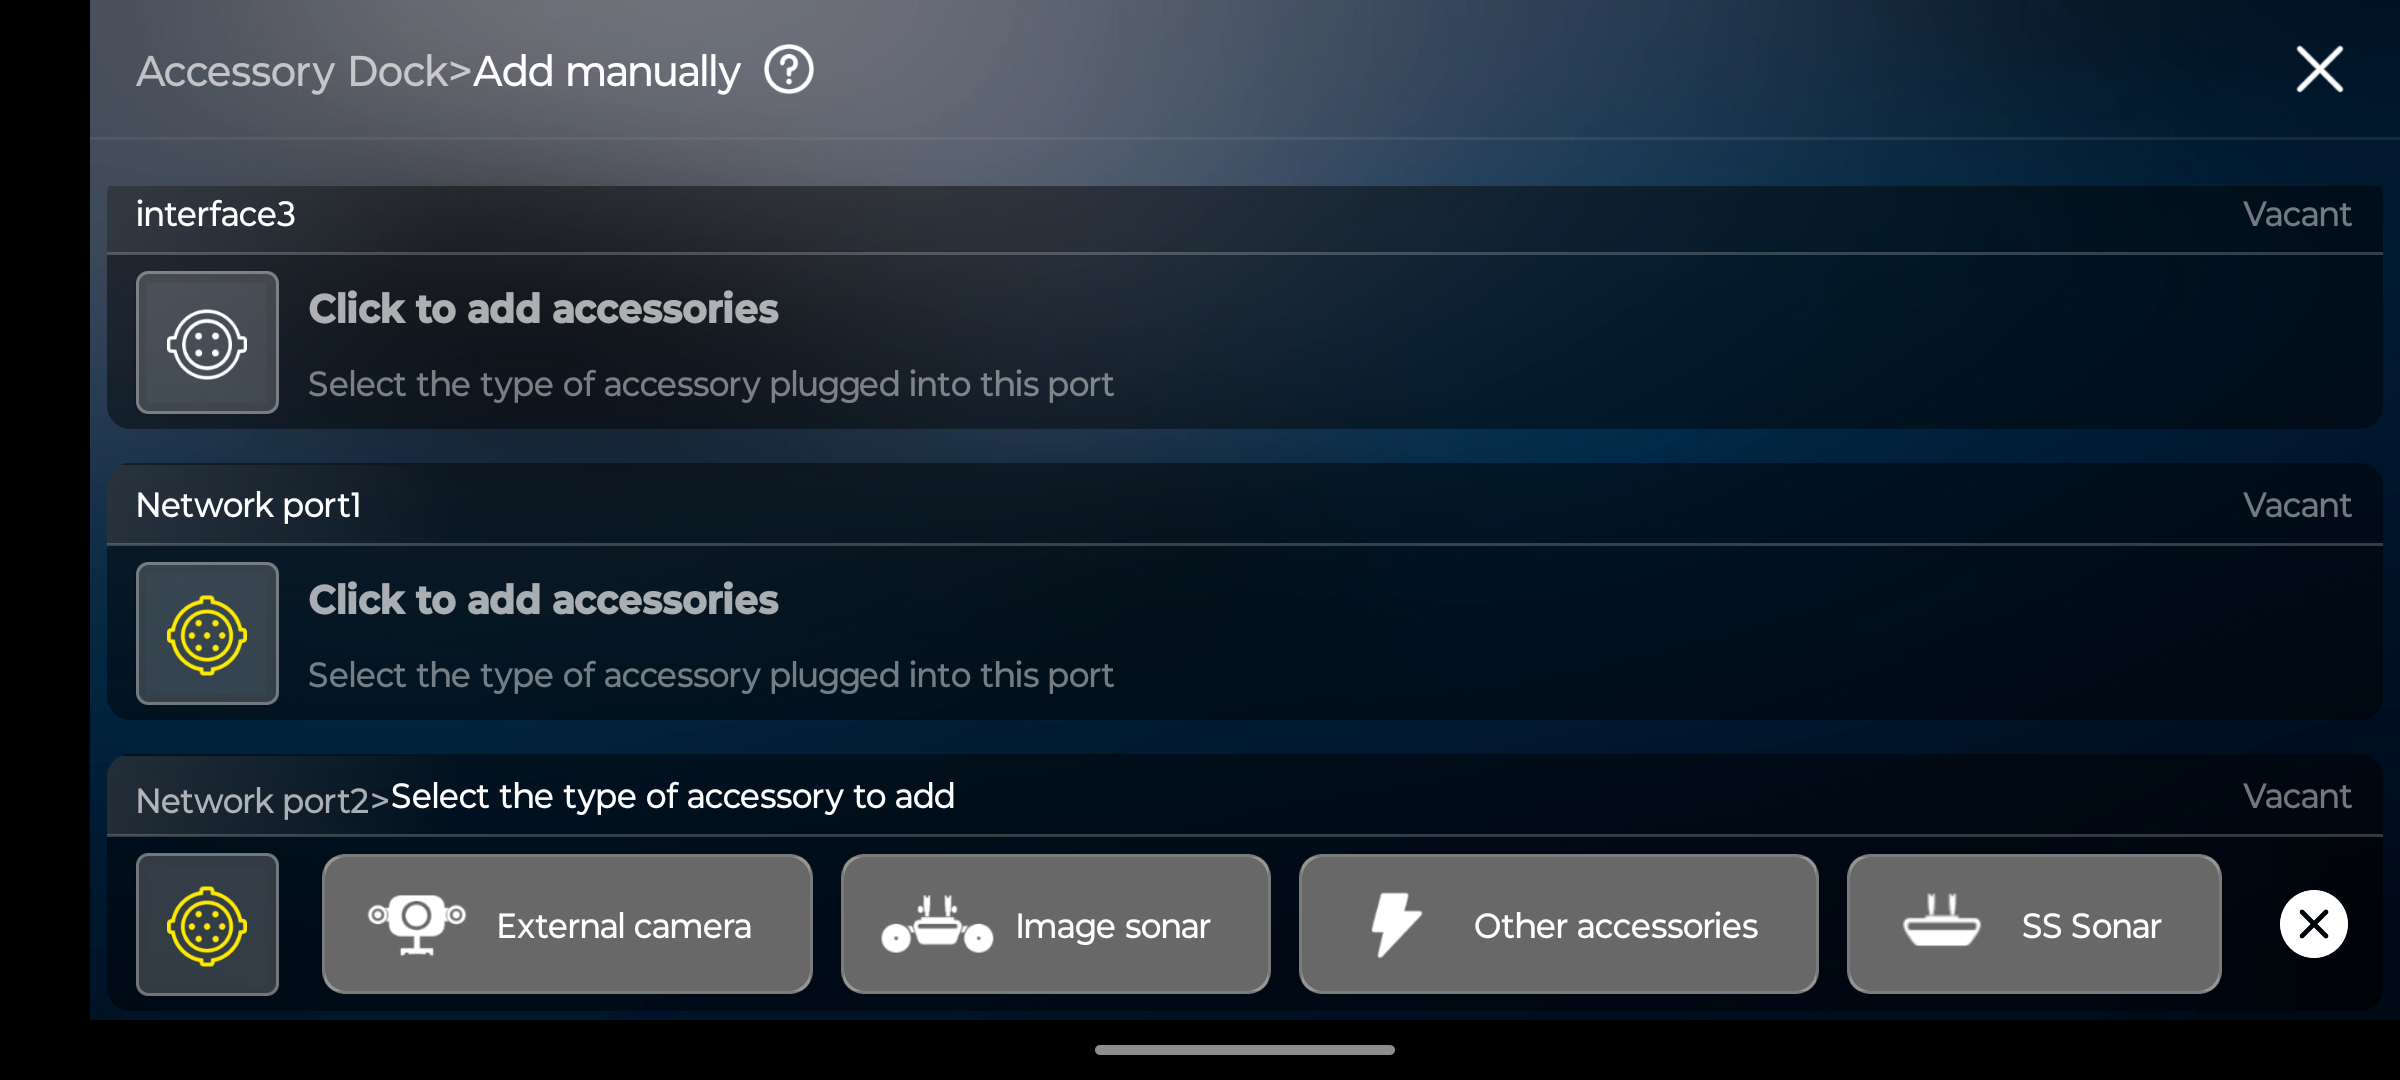
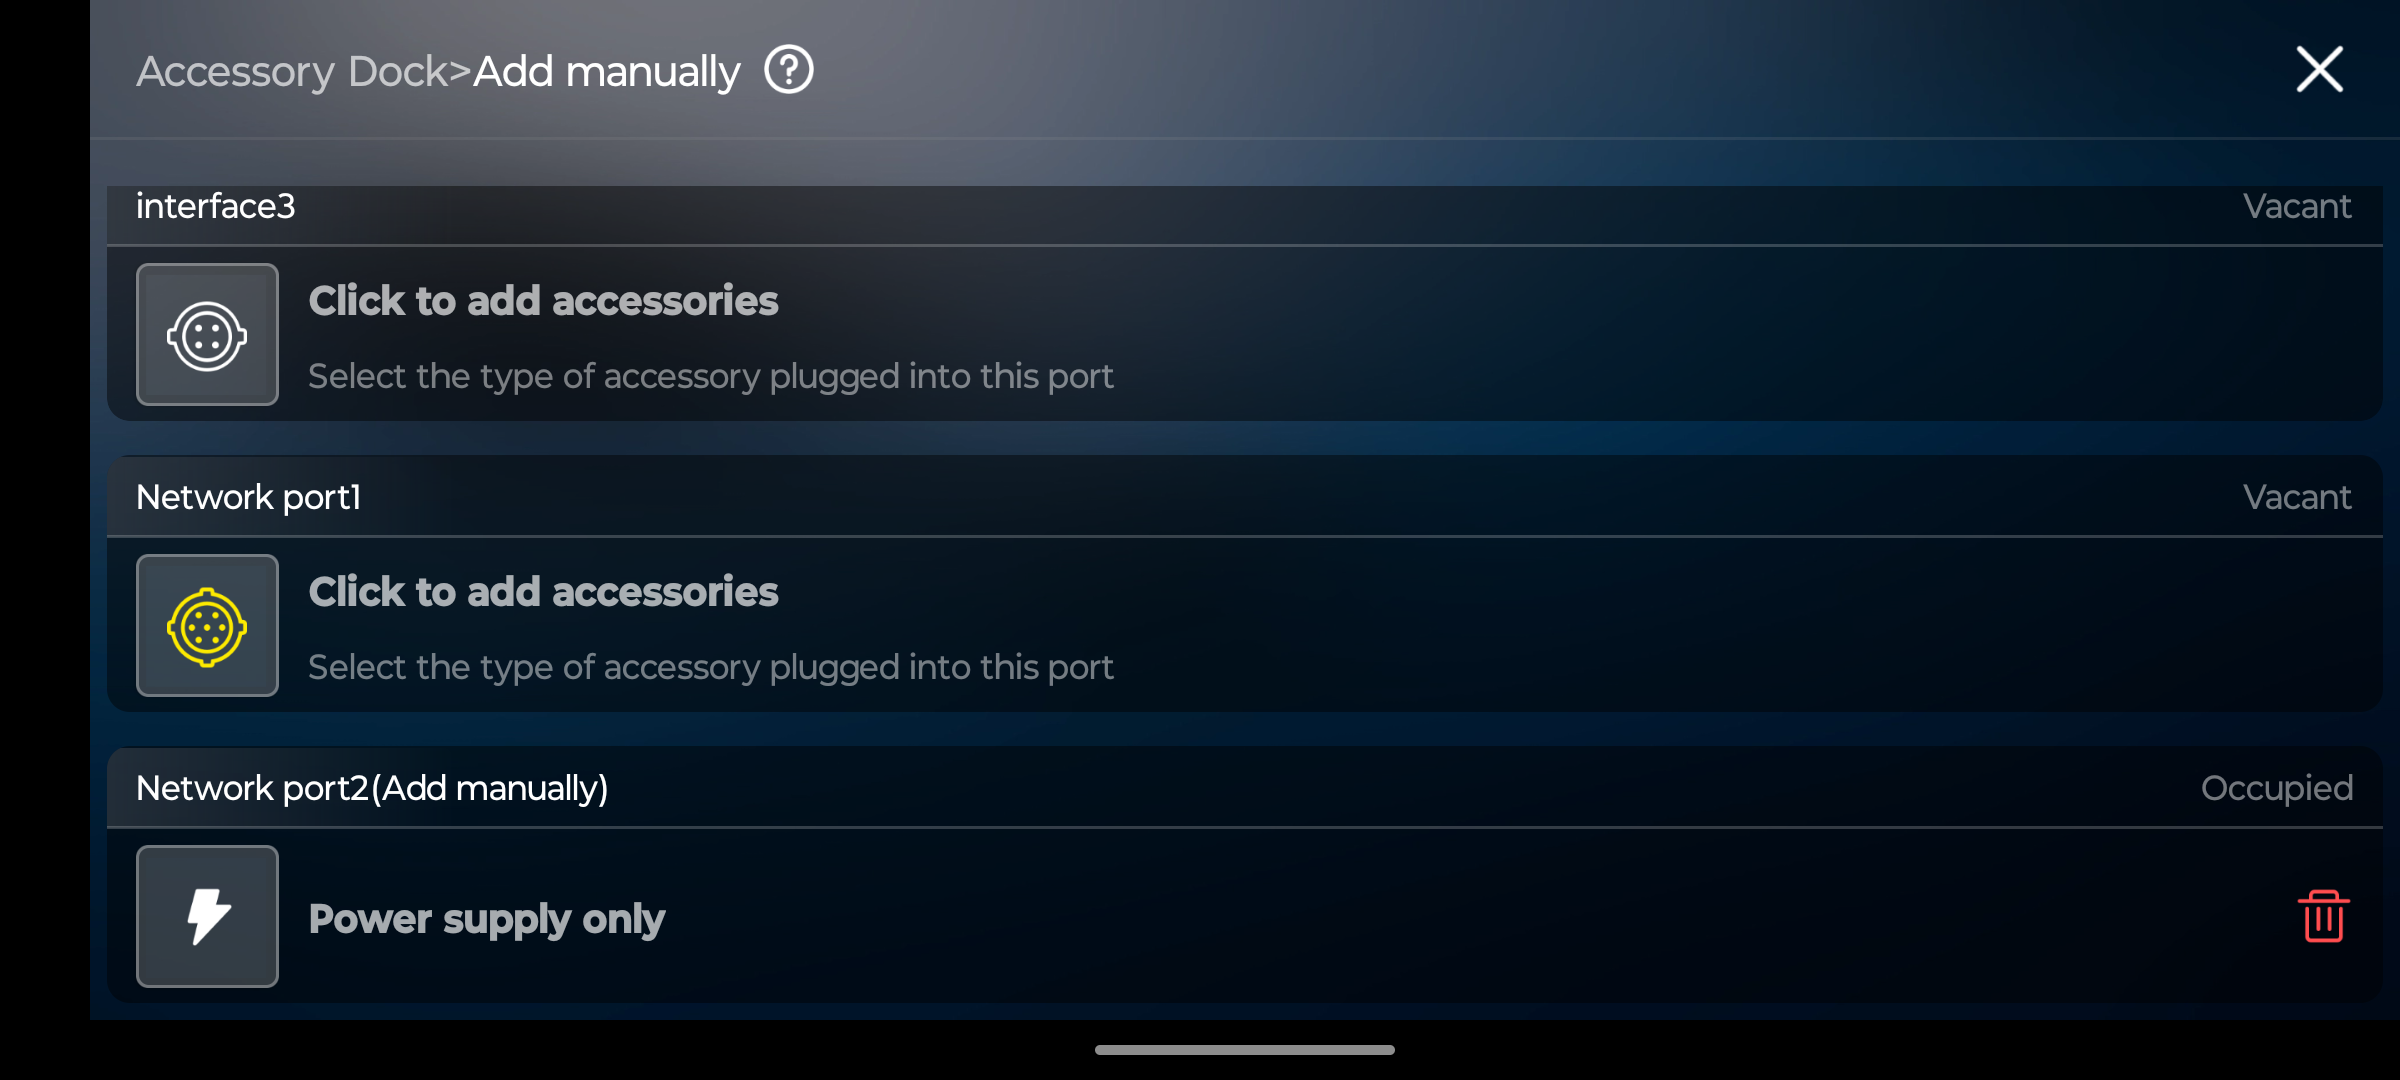
Select "Click to Add Accessories" on the Network port the Sonar 3D-15 is connected to.
Click "Other accessories".
Now the Sonar 3D-15 will be powered and assigned an IP-address by the Chasing ROV.
Note
If the green light at the front of the Sonar 3D-15 is on, the Sonar 3D-15 is receiving power.
4. Access the Sonar 3D-15 GUI🔗
The Sonar 3D-15 GUI is accessed by entering the Sonar 3D-15's IP-address into the browser running on any device connected to the Chasing Wi-Fi.
Note
We recomend operating the Sonar 3D-15 GUI on a seperate device so that you can view the sonar while continuing to operate the ROV as usual on the main ROV controller display; typically your smartphone.
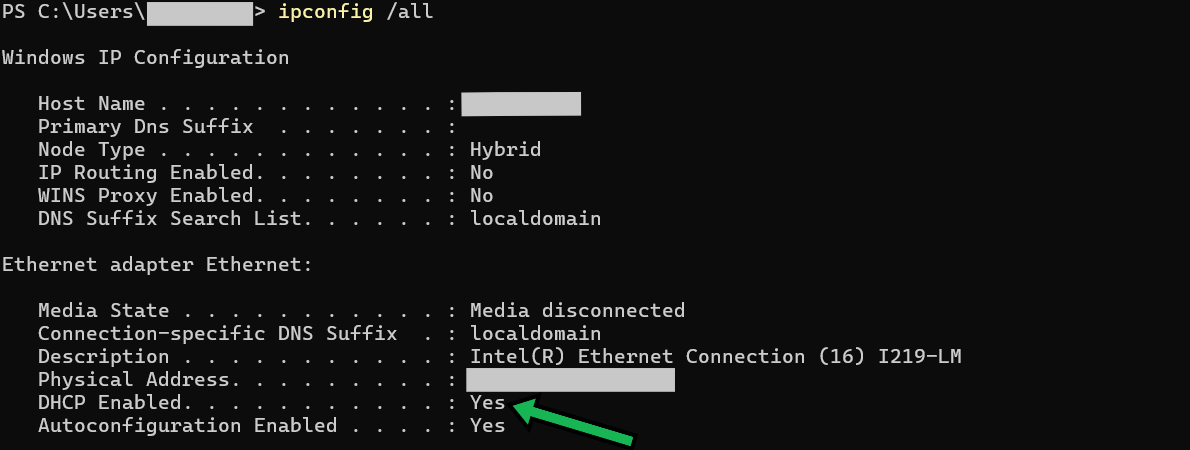
Both the device and Chasing need to have DHCP enabled. This is standard for most computers and phones and is normally enabled. To check if your computer has DHCP enabled, do the following:
Checking DHCP🔗
--> Windows - Option 1:
- Open Settings > Network & Internet.
- Click on Ethernet
- Select your active connection.
- Scroll to IP settings:
- If it says Automatic (DHCP) → it's enabled.
- If it says Manual → DHCP is off.
--> Windows - Option 2:
-
Run the following command in the Windows terminal
ipconfig /all -
Look for the section Ethernet adapter Ethernet and the line DHCP Enabled (green arrow)
-
If DHCP Enabled is set to Yes, then DHCP is enabled.
--> Linux:
- Run the following in the terminal:
for iface in $(ip -o link show | awk -F': ' '{print $2}'); do
  echo "Interface: $iface"
  ip addr show "$iface" | grep -q dynamic && echo "  --> DHCP detected" || echo "  --> Static or unknown"
done
If you see --> DHCP detected, your PC has DHCP enabled and you are ready to continue.
If DHCP is disabled, please enable this on your computer.
Determining the IP-address🔗
Once you have assured that your device is using DHCP, you need to determine which IP-address has been automatically assigned to the Sonar 3D-15 by the Chasing system. Once located, entering it in your browser displays a page like the one below — in this example, the Sonar 3D-15 is assigned the IP-address 192.168.1.21.
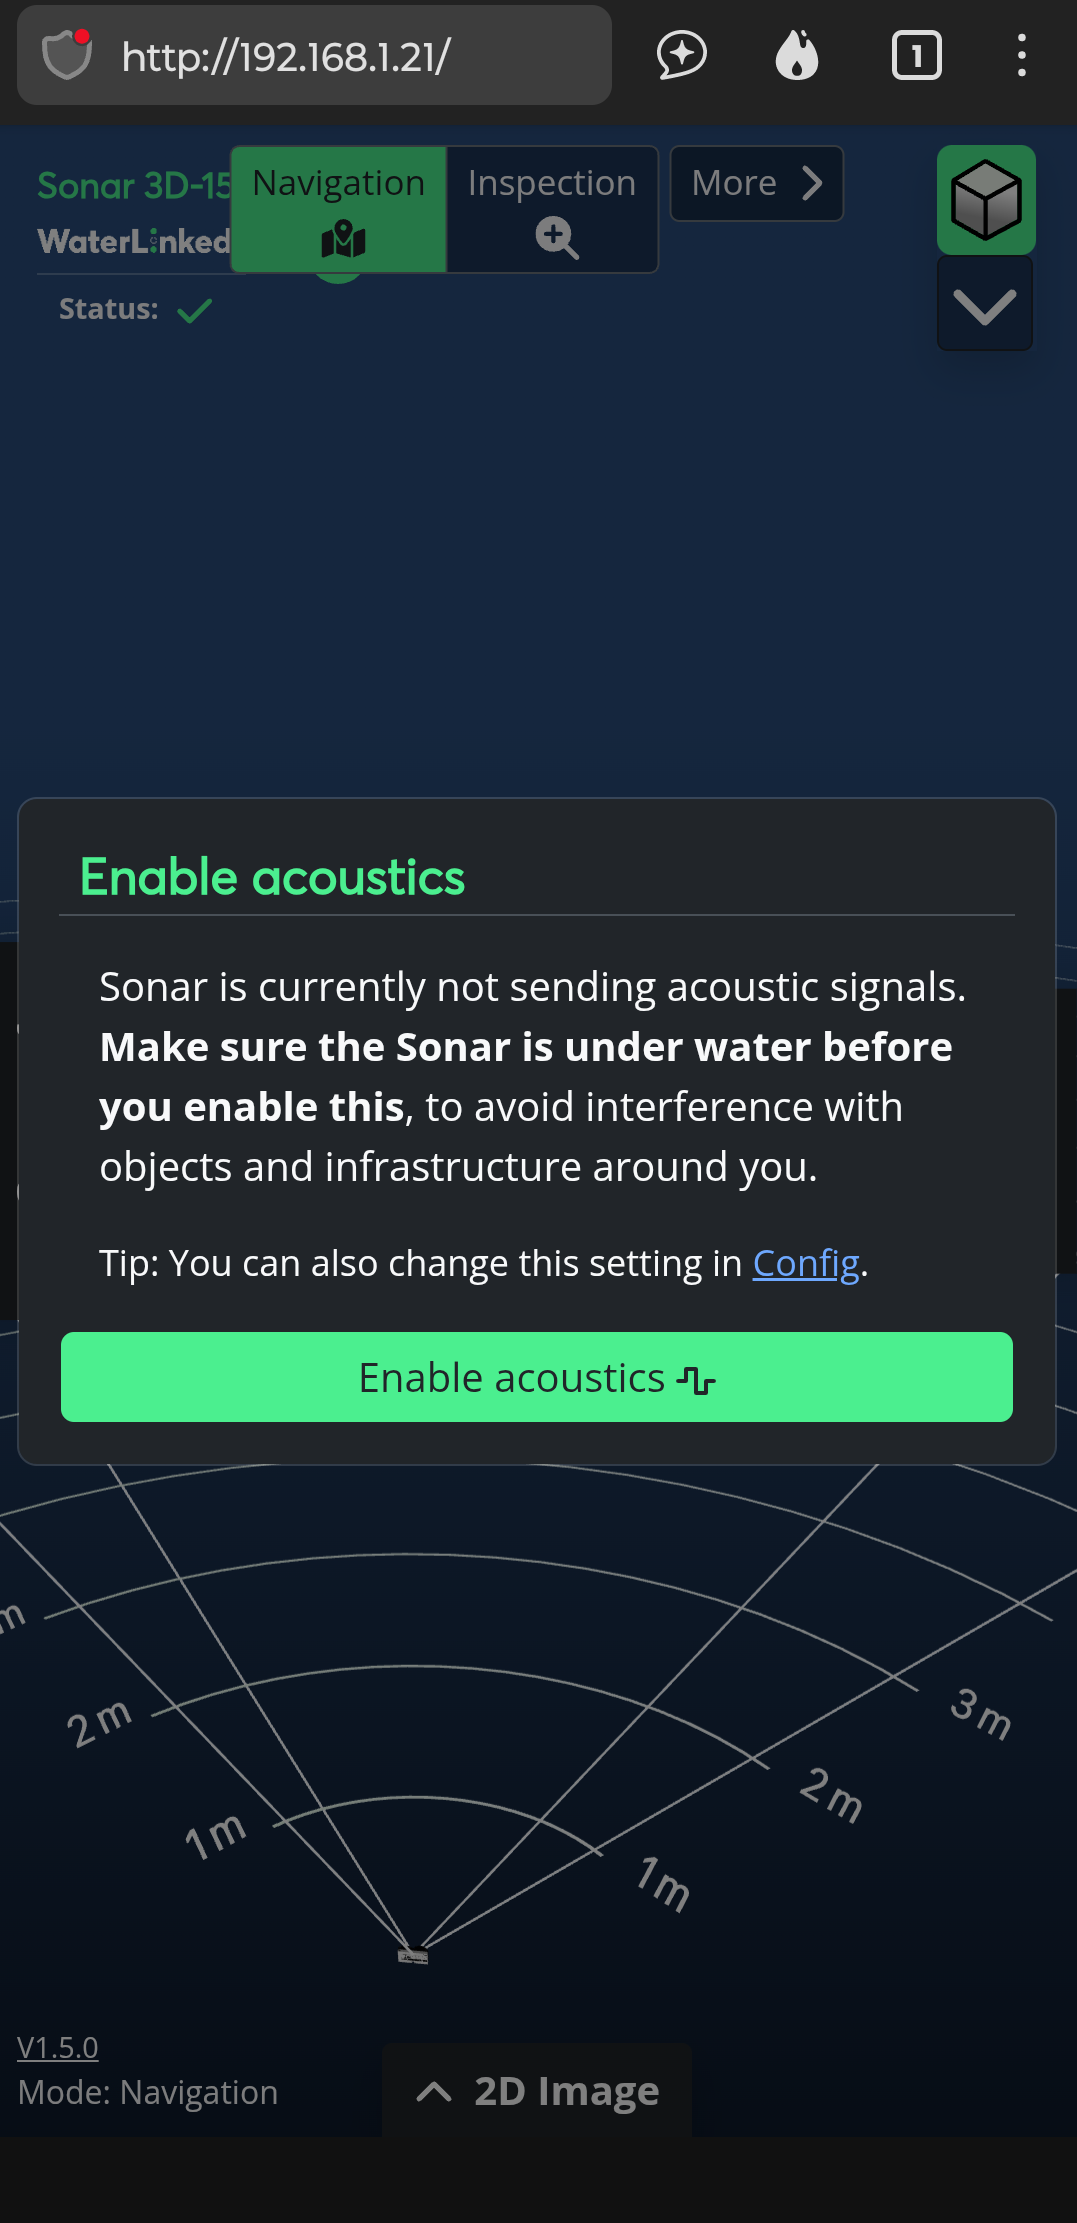
Warning
To avoid overheating, do not click the green button “Enable Acoustics” until the ROV is submerged in water.
Acoustics is always disabled when first booting up the Sonar 3D-15, and will be turned on once this button is clicked. The Sonar 3D-15 will automatically turn itself off if too hot, but will take some time to cool down, it's best to avoid this happening.
Find the IP-address corresponding to the Sonar 3D-15 on a computer by doing the following:
-
Get an overview of the network
--> On a computer
You need the network IP-address of your computer on the Chasing network. On Linux you find it by typing in:
in the terminal.ip aOn Windows you find it by typing in:
ipconfigTip
It's easier to find your IP-address if your computer is connected only to the Chasing network.
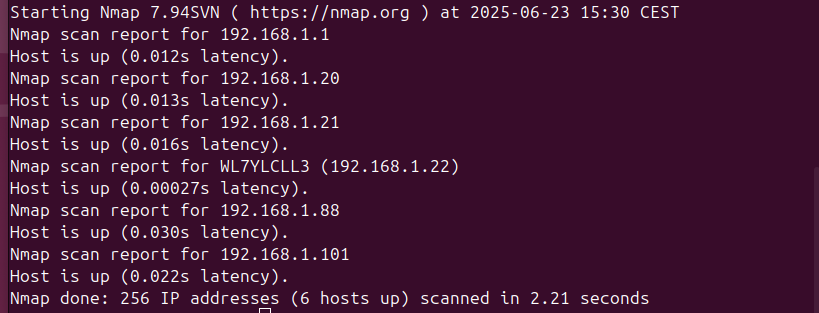
A quick easy way to see the IP-addresses of the devices on your local network is to use nmap. Install it for your operating system and go to the terminal and write
nmap -sn <YOUR_IP>This will scan the Chasing Wi-Fi and show all accessible connected devices and their IPs.
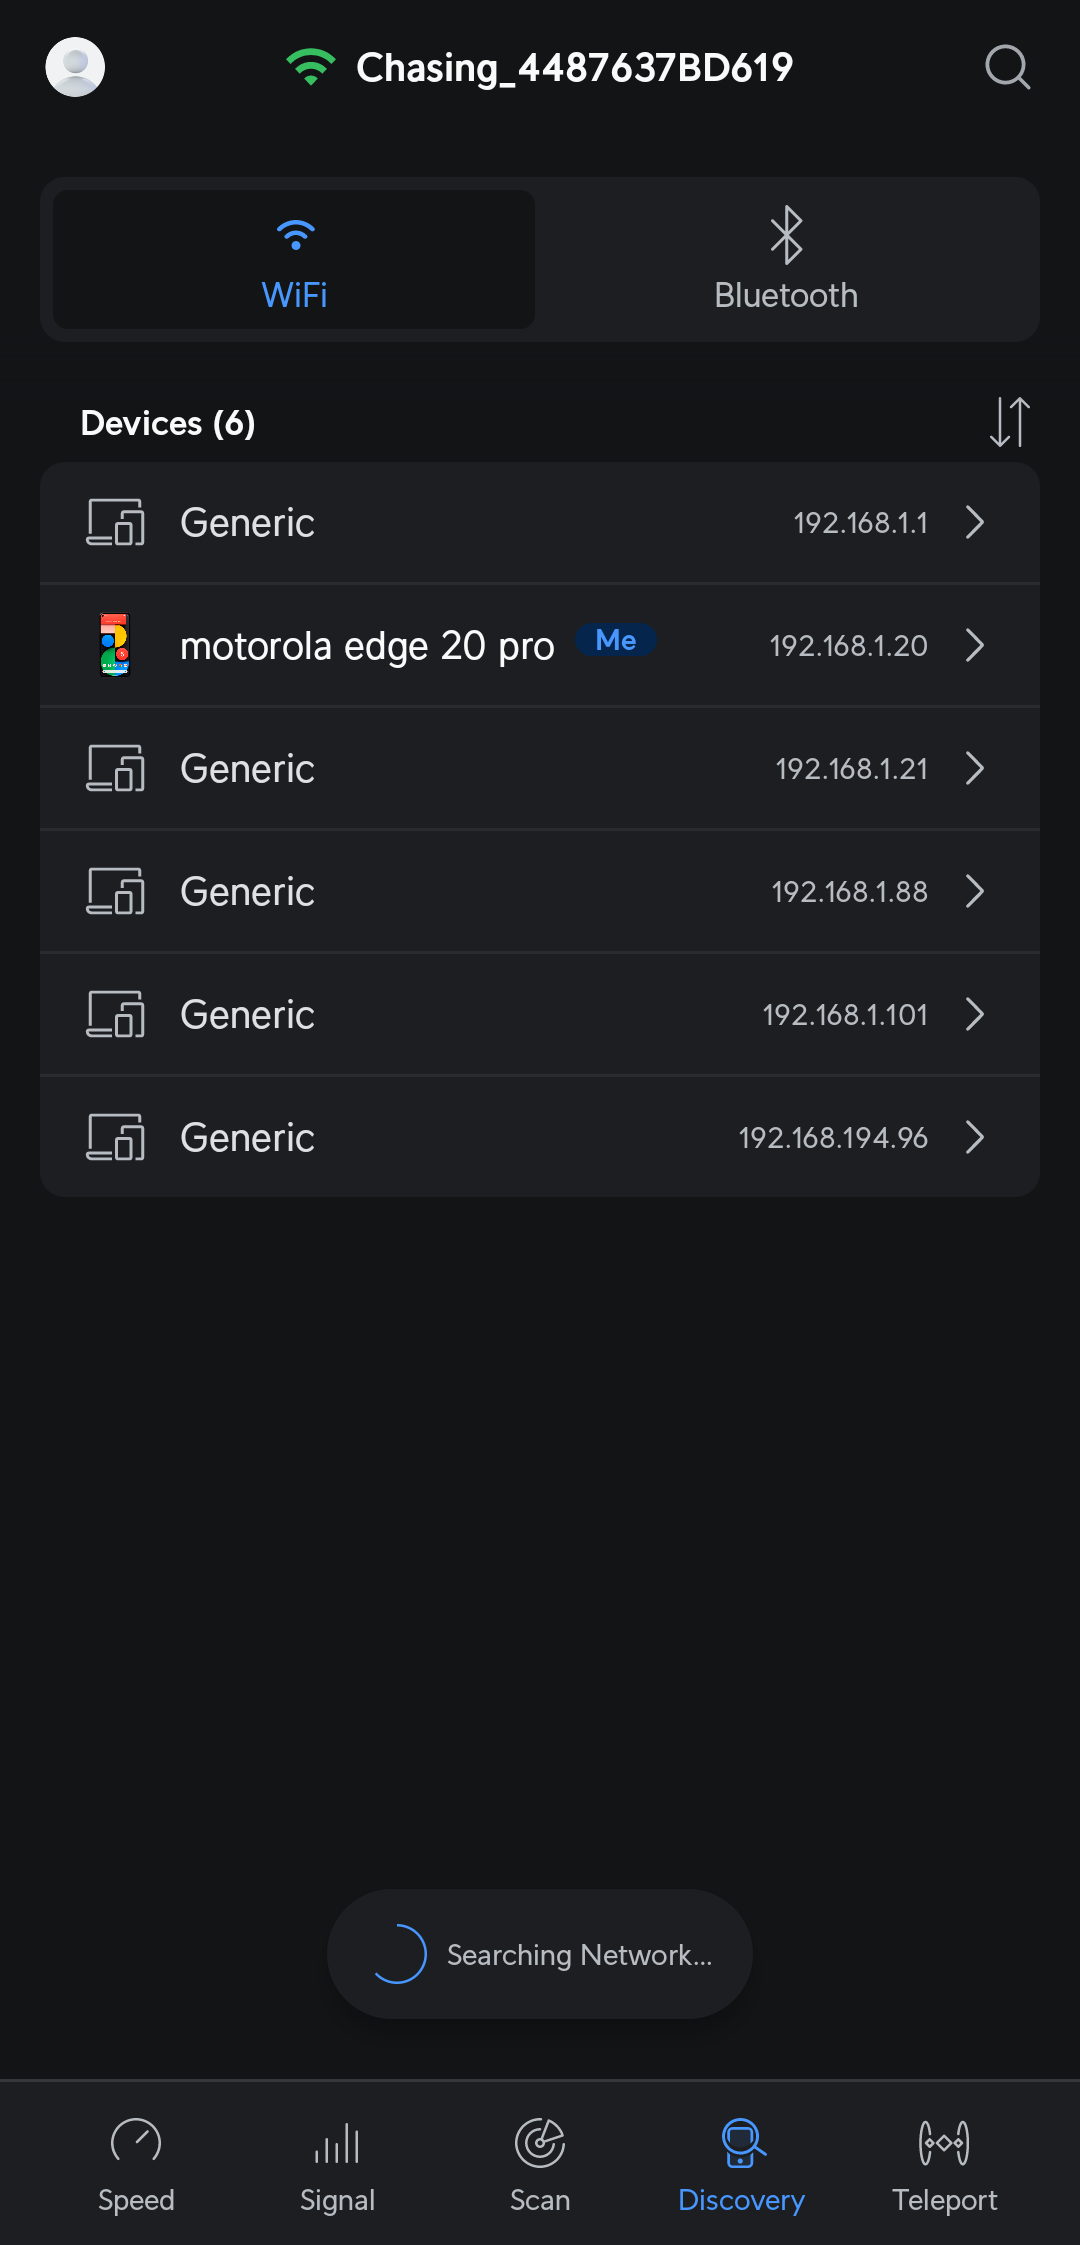
--> On a smartphone
WiFiman by Ubiquiti is a good and free option to perform an IP-scan and find all accessible IP-addresses on the network. It can be downloaded from Google Play or Apple Store.
Note
There are many options of apps and programs that can perform a IP-scan of the network. Fing is another app that works well.
Once installed and inside the WiFiman app, go to Discovery and scan the network. A list of all connected devices on the network will show, similar to the following:
-
Test and find the IP-address
To find the IP-address of the Sonar 3D-15, try the IP-addresses on the list by typing them into the search bar of your browser.
- For example, if you have the list above, try
192.168.1.1,192.168.1.20,192.168.1.21and so on. You may try them all safely.
If the Sonar 3D-15 GUI appears, you have found the correct IP-address.
- For example, if you have the list above, try
Tip
It is possible to access the GUI on the Sonar 3D-15's fallback address 192.168.194.96. This method is explained in more detail on the general quickstart guide, which can be found at Quickstart .
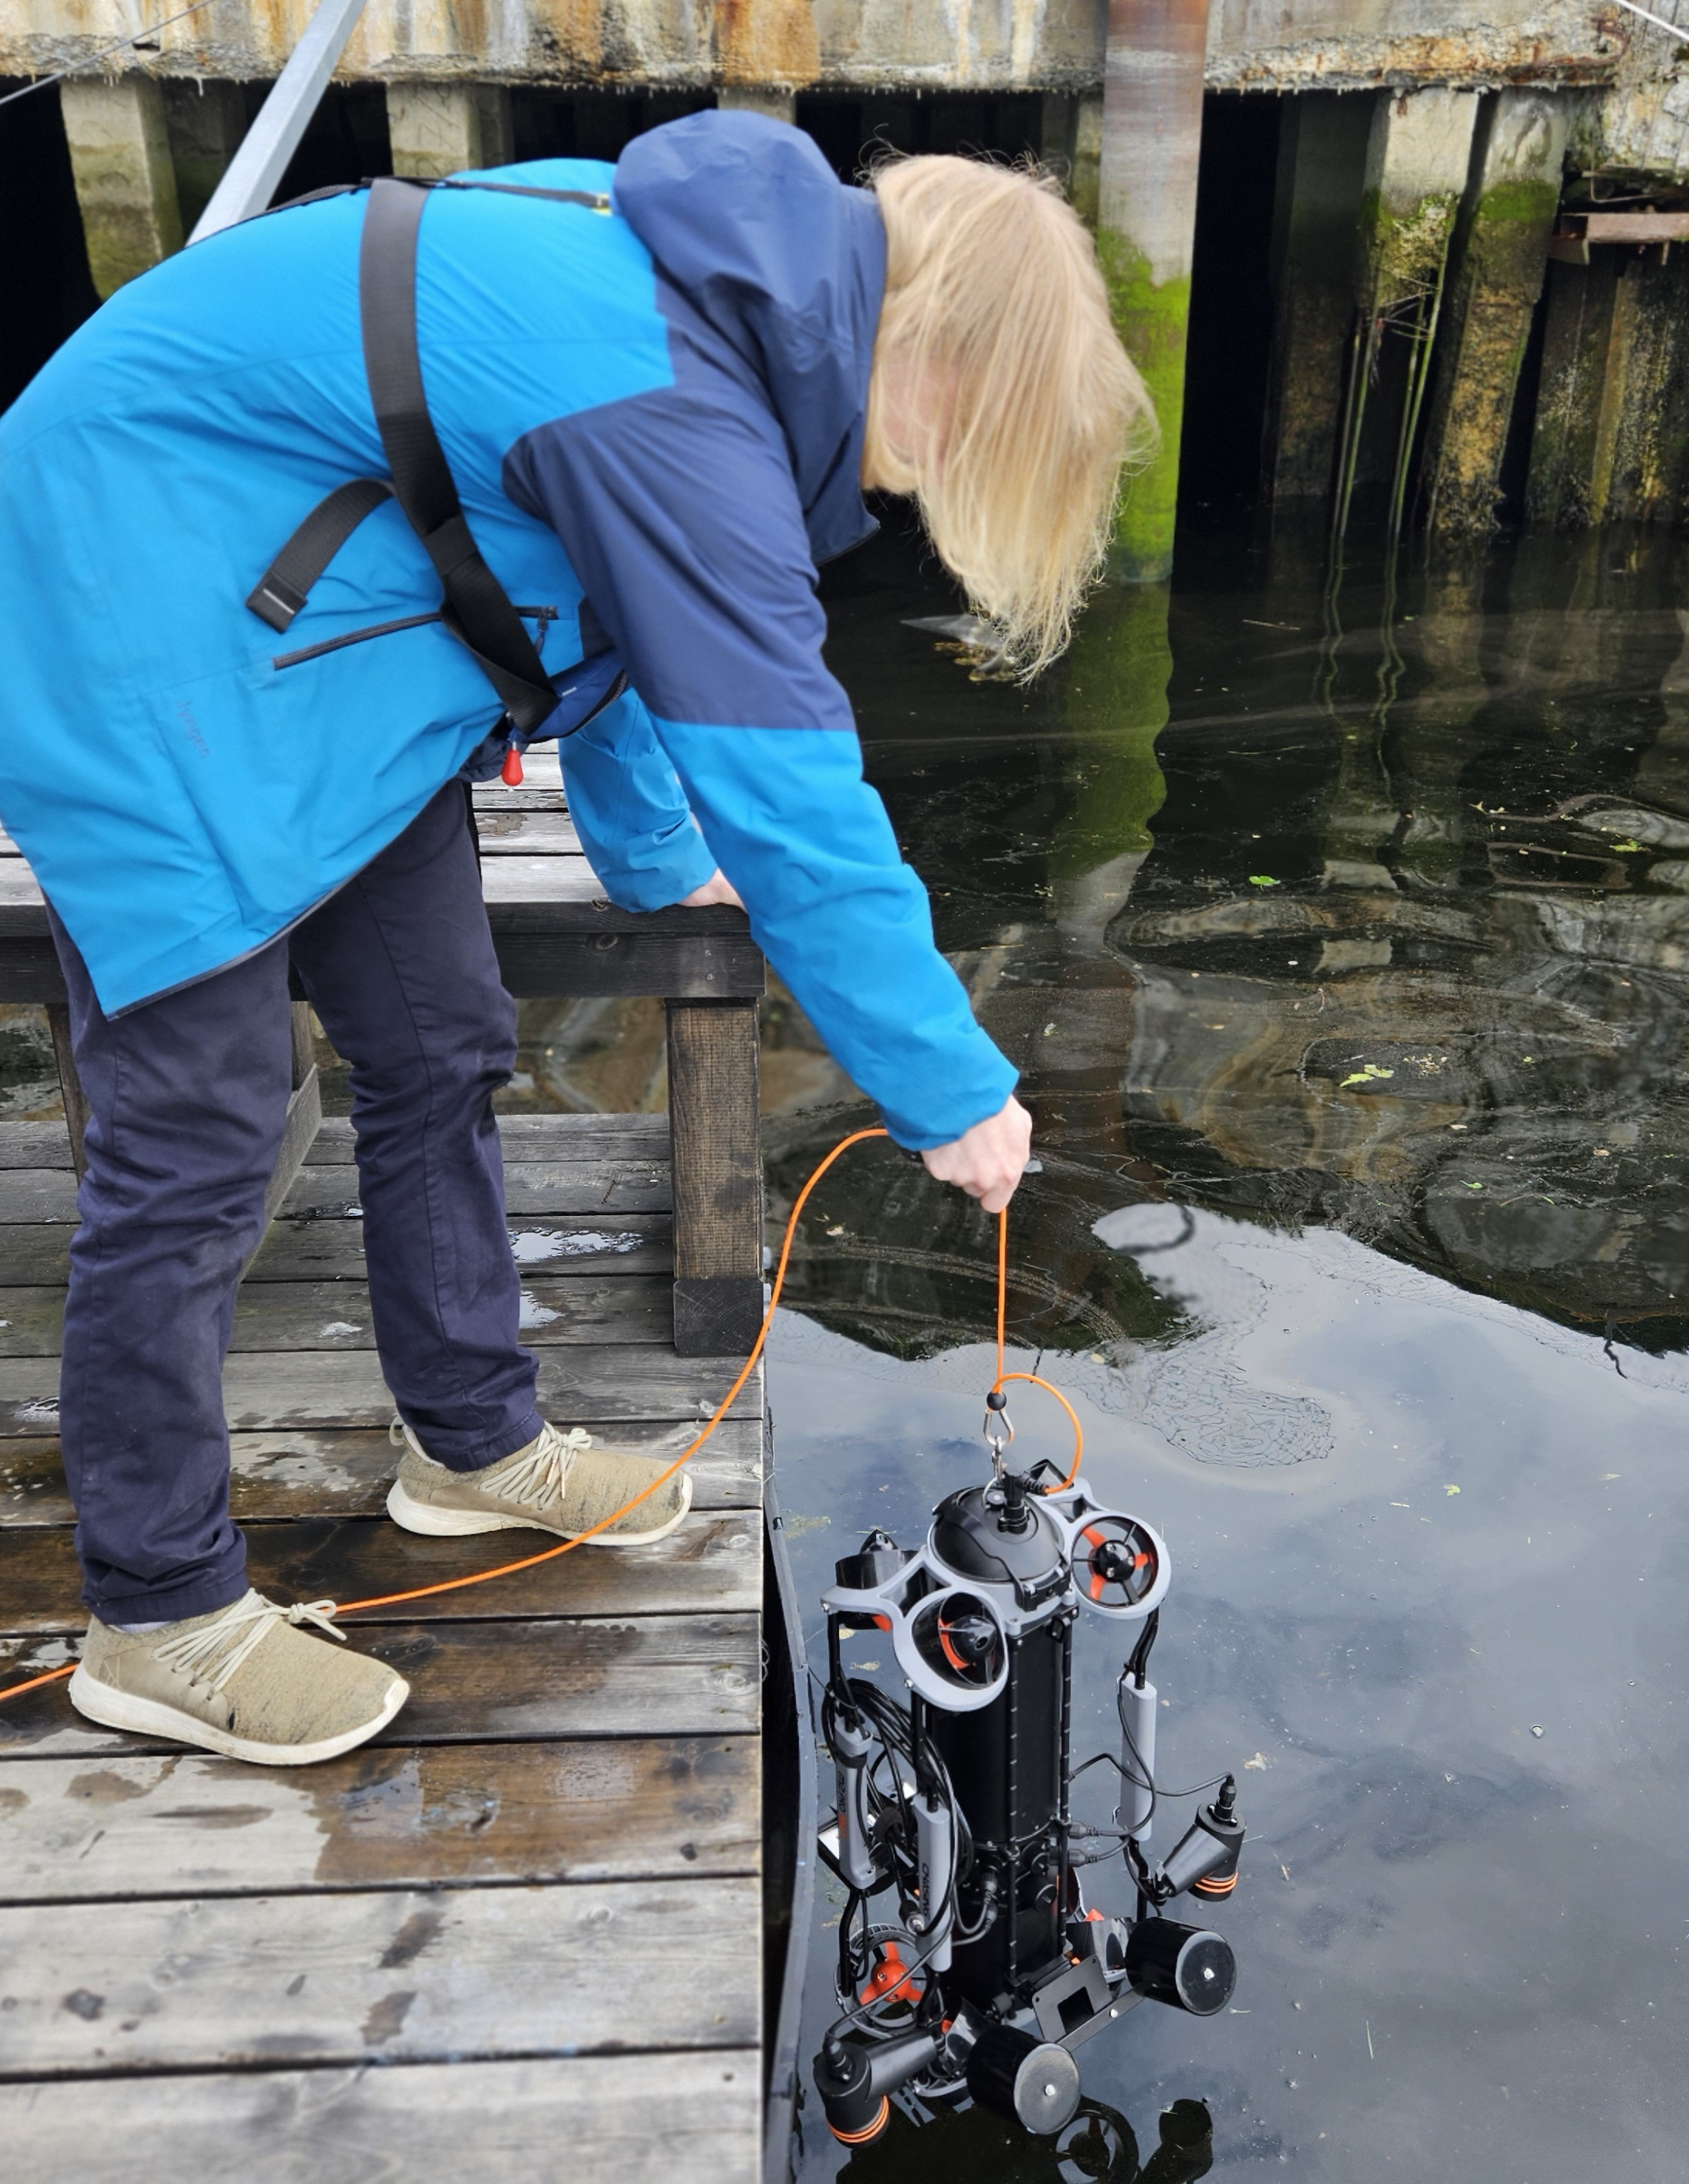
5. Put the ROV in water🔗
You are now ready to put the ROV in water.
6. Enable acoustics🔗
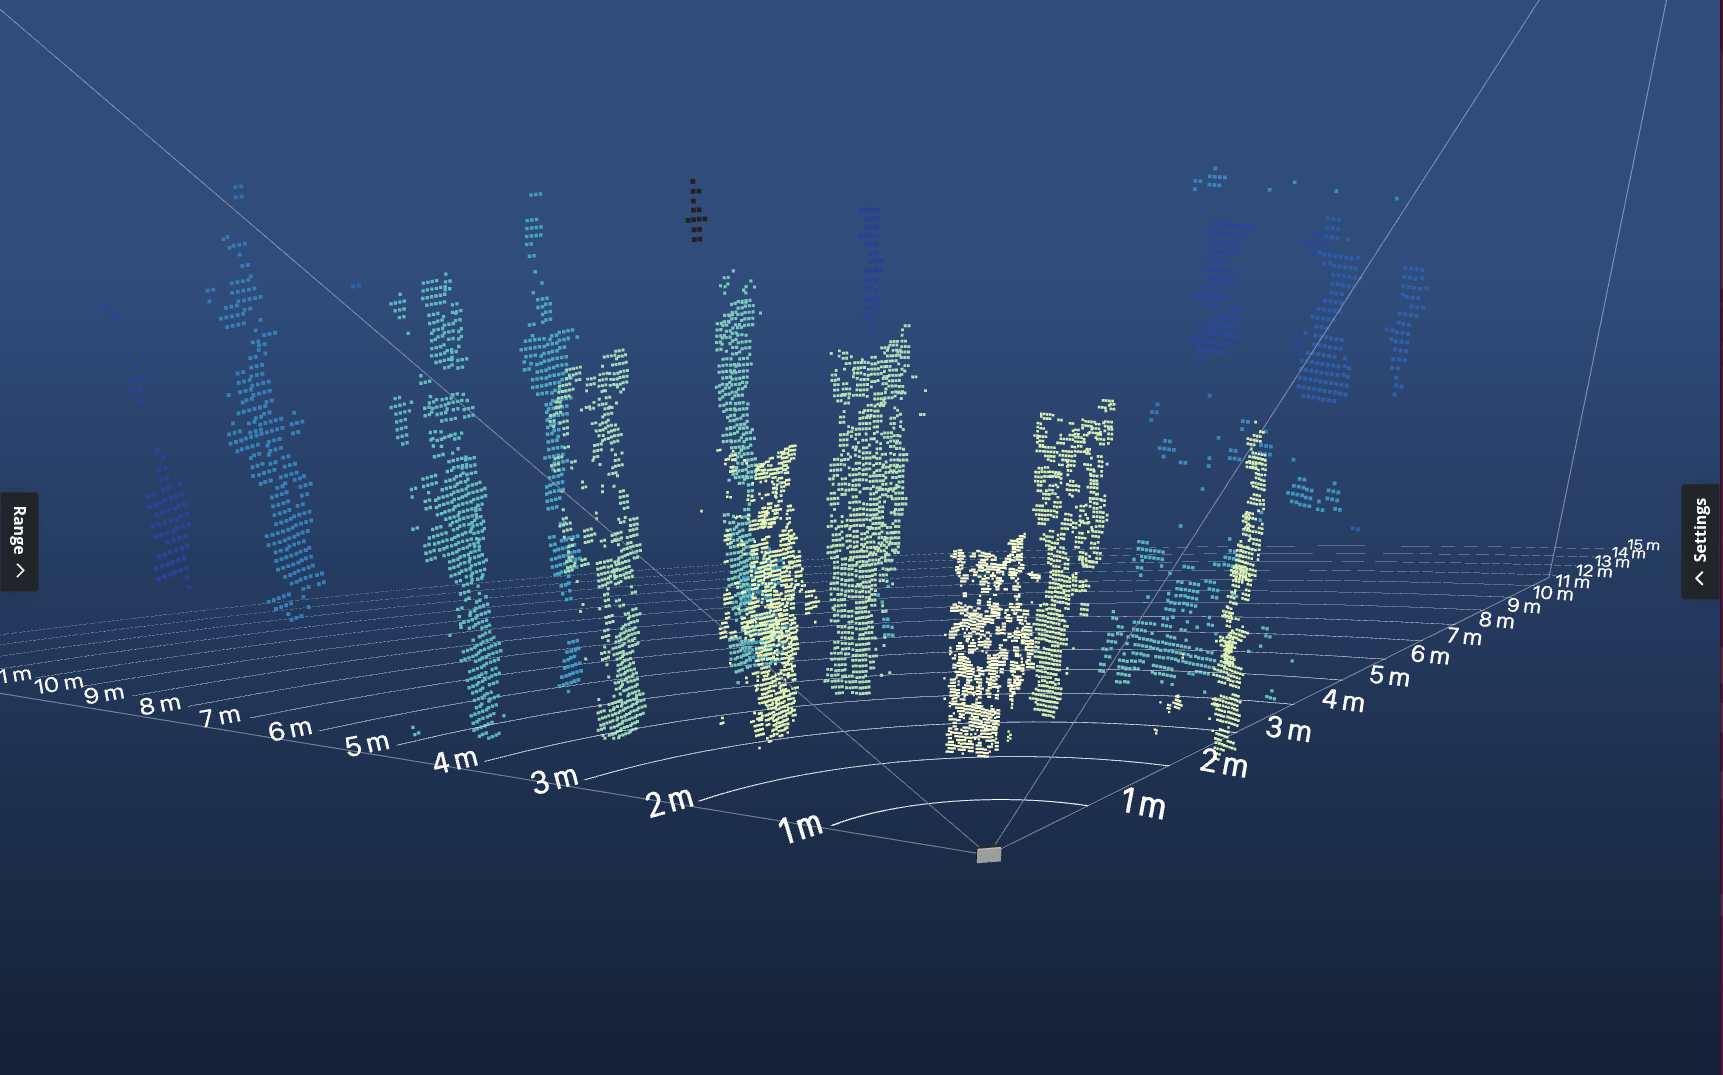
When ready, click the ”Enable Acoustics” button to initiate the Sonar 3D-15. It will display a point cloud in the GUI representing the 3D space in front of the Sonar 3D-15.
You are now ready to operate the Water Linked Sonar 3D-15 with the Chasing ROV!